
 Nederlands
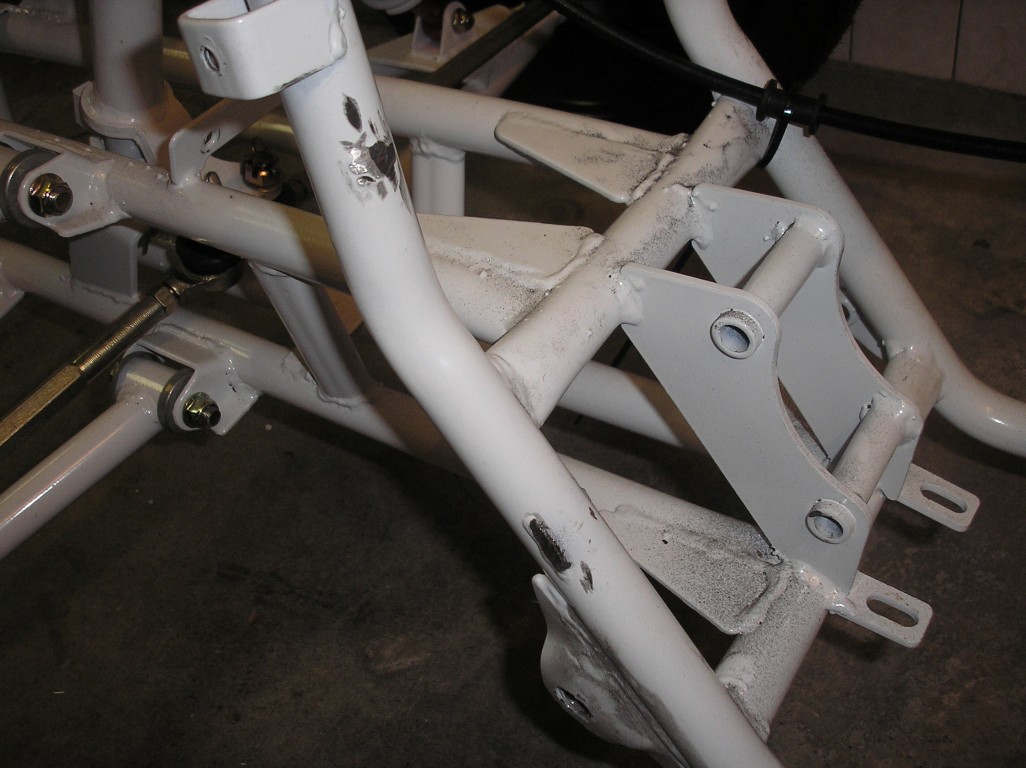
Blog

Posted on 4 January 2013 at 09:48 pm (CET)
Category: Frame
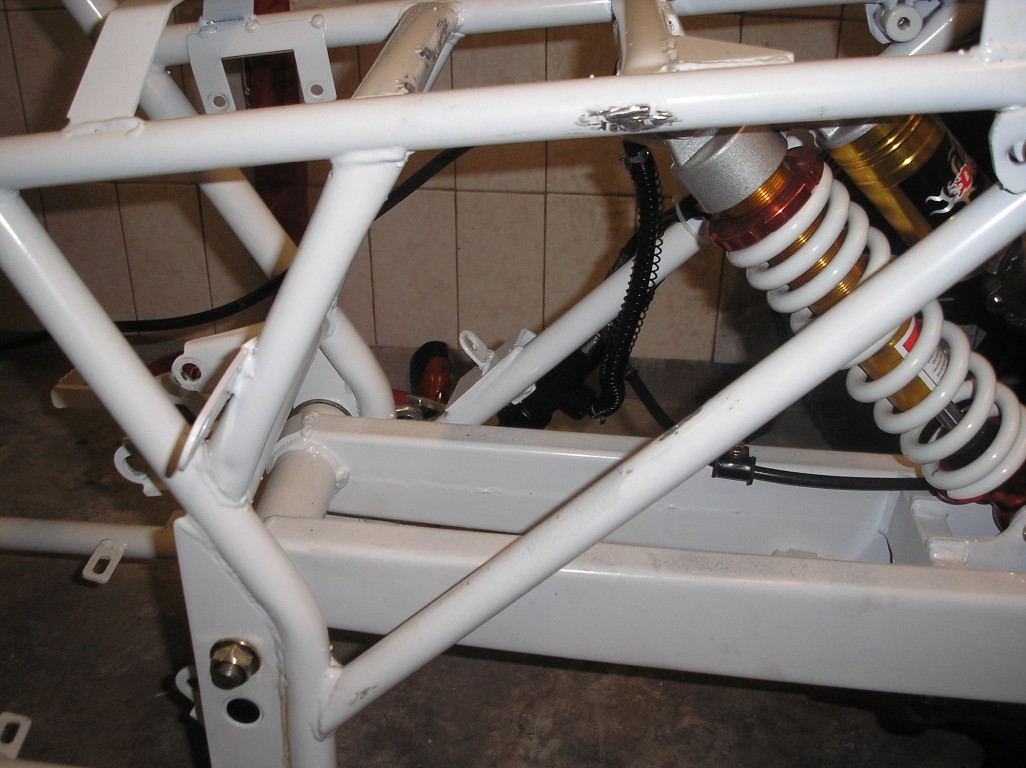
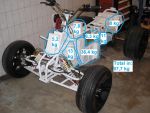
Today I cut off a few parts that were in the way, also the battery tray.
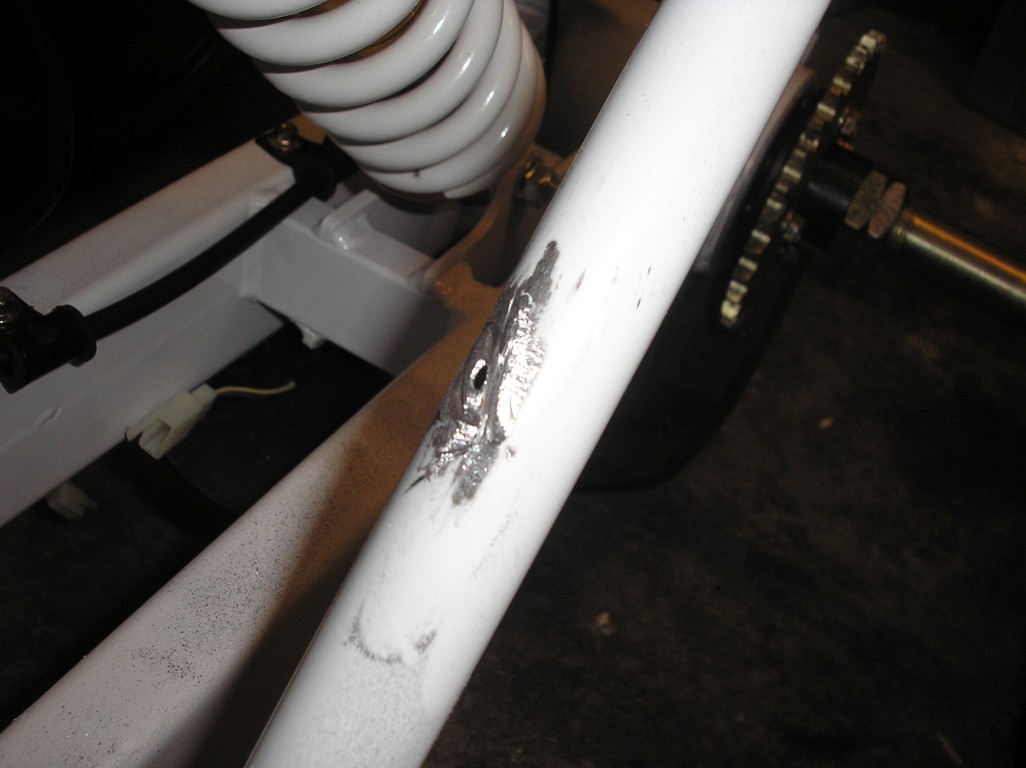
Only had a small problem removing the battery tray. Couldn't cut it off completely because of the annoying angle so I tried bending it a bit to get it off. It worked, but sadly it also made a small hole in the frame. I'll have to get this welded up again. Hopefully this will give no further problems.
At least there's enough room for the motor now. The battery tray will probably just come a little higher, plenty of space there.
Still have to cut off the rear engine mounts and mounts for the radiator to create more room for the batteries. It's just that these are also placed at an annoying angle, can't really get to it easily. So I'll have to think about how to do this properly first.
Posted on 24 December 2012 at 06:13 pm (CET)
Posted on 24 December 2012 at 06:13 pm (CET)
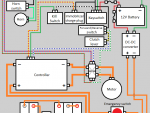
Finished the whole wiring diagram now. Only still have to add the BMS but I can't yet till I actually have it here. No idea how it'll get wired up just yet.
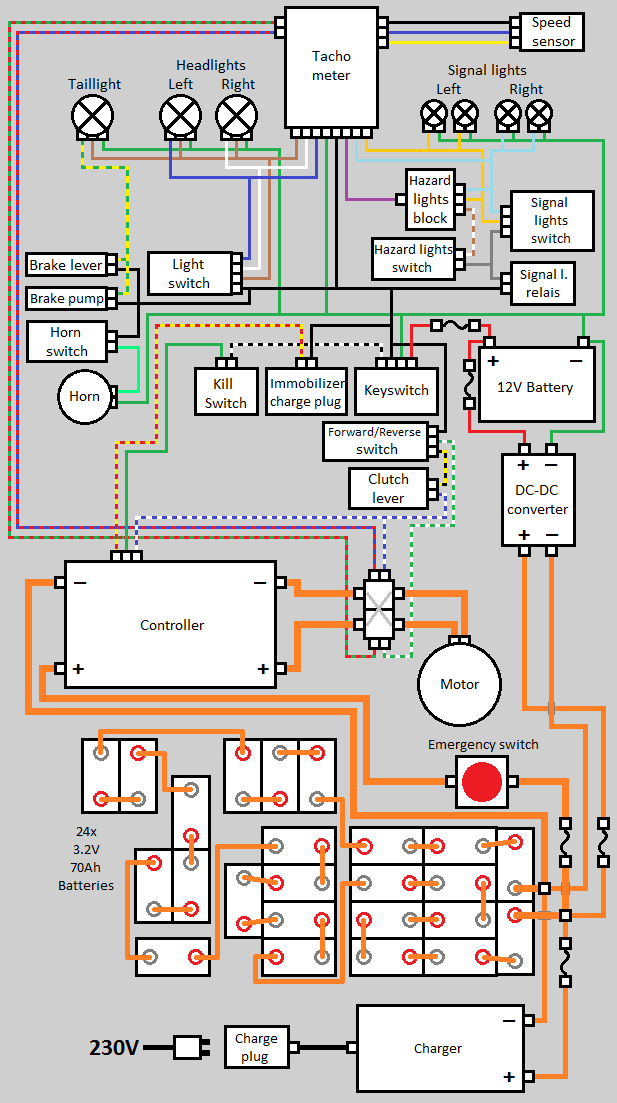
The only thing I'm not sure about is the clutch lever. I want to use this in combination with the forward/reverse switch to be able to drive in reverse. According to the regulations of the RDW (Dutch road safety institute) you need 2 seperate actions for this (or only able to activate below 5 kmh but this will be too complicated I think) so I think this will be the easiest solution. Just don't know if it's possible this way or if I'd be shorting out the controller when the switch is in reverse and the clutch lever isn't pulled. So I'll have to ask around a bit before I actually connect it like this.
Posted on 23 December 2012 at 05:55 pm (CET)
Category: Drawings, Wiring (12V)
As I'm planning to make a new wire harness I already started making a wiring diagram. The 12V part is pretty much done now. Will probably have to add some more to it later on for the controller and BMS but still don't know exactly what.
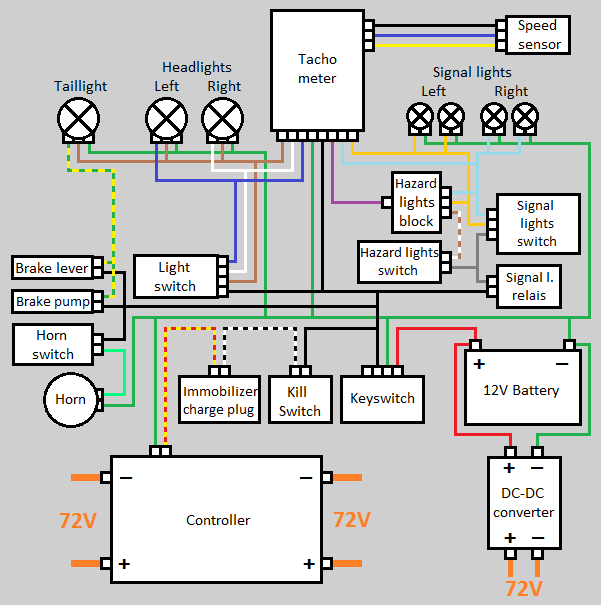
I think I'll just add the 72V wiring into this as well, at least I have one clear diagram for everything then.
Meanwhile I've also placed an order for the controller, charger, cables and some other small parts at Rebbl, a company that also converts cars to fully electric. If all goes well I should have all of these within 3 weeks.
Posted on 16 December 2012 at 09:18 pm (CET)
Category: General
Posted on 16 December 2012 at 09:18 pm (CET)
Category: General
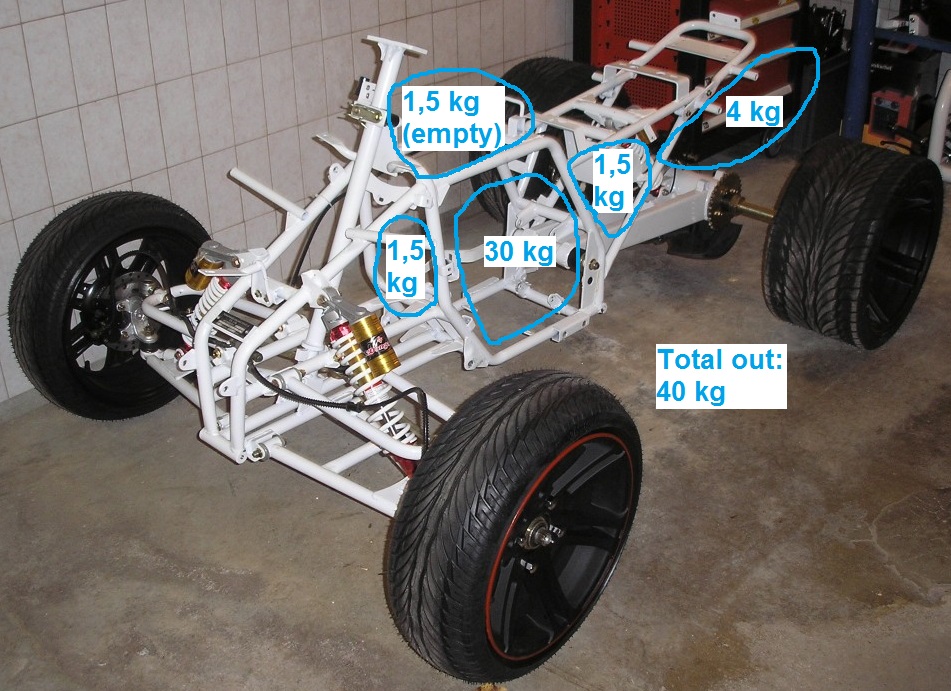
Today I checked the weight of all parts I've taken out. I wanted to know if the weight would stay equal or maybe a bit heavier. And apparently it will get a bit heavier after all but still nothing to worry about for passing inspection. The weight balance will probably stay around the same I think, still hard to tell.
Weight of original parts (with empty gas tank).
Expected weight of parts after conversion.
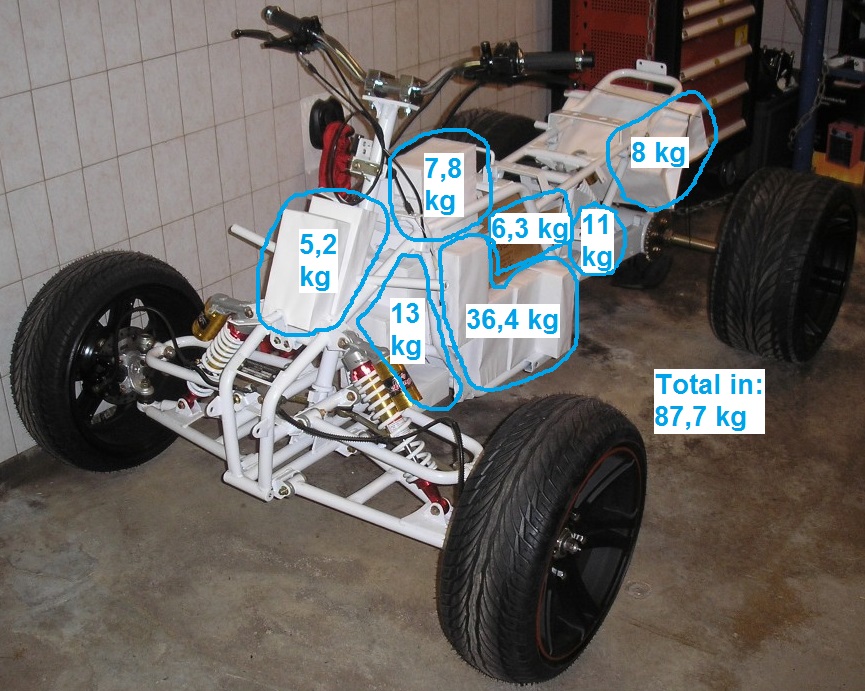
I also still changed the layout a bit, one battery that I had placed above the charger I moved to the front. Should fit pretty well there and this way I'll have some more space around the charger for better heat dissipation while charging.
Posted on 15 December 2012 at 10:15 pm (CET)
Category: Wiring (12V)
Today I checked the 12V wiring and tested if all the lights and tachometer works.
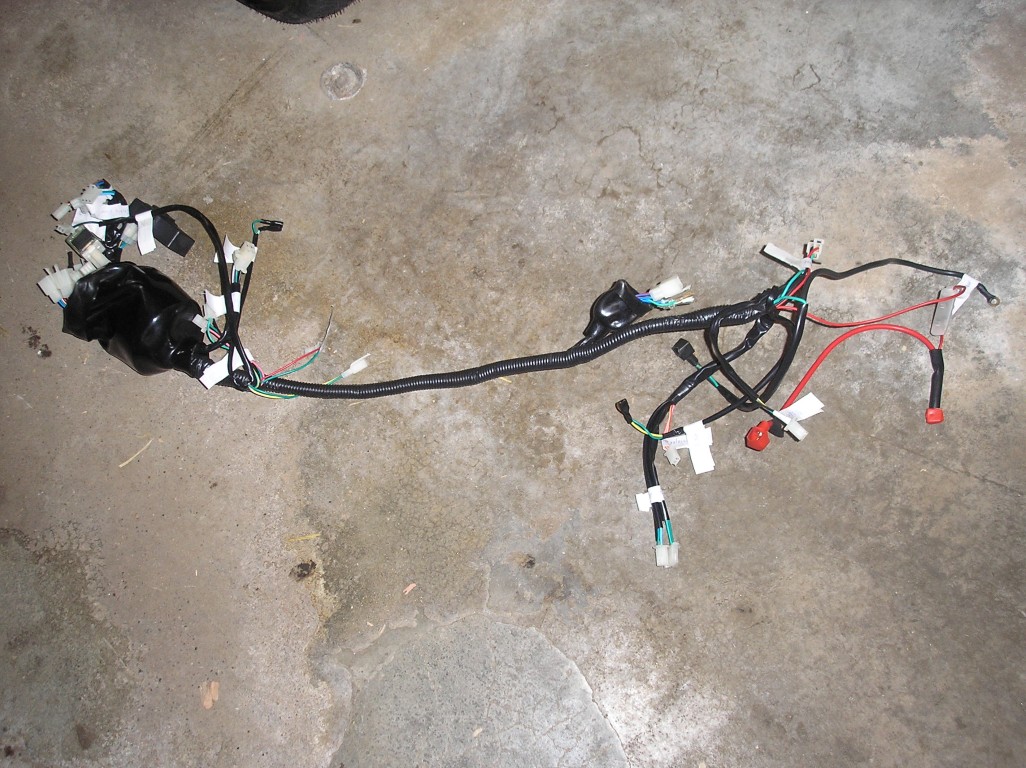
First I had to remove all tape so it would be easier to see how the wire harness is connected.

Everything worked well, except 2 wires that were switched in a plug but that was easy to fix.
I'm just not that happy with this wire harness since the color codes don't really match with some of the components. It's also soldered together pretty badly and the plugs aren't even waterproof. I'm thinking of just making a complete new wire harness instead of using this one. It's a bit more work again but it'll be worth it in the end.