
 Nederlands
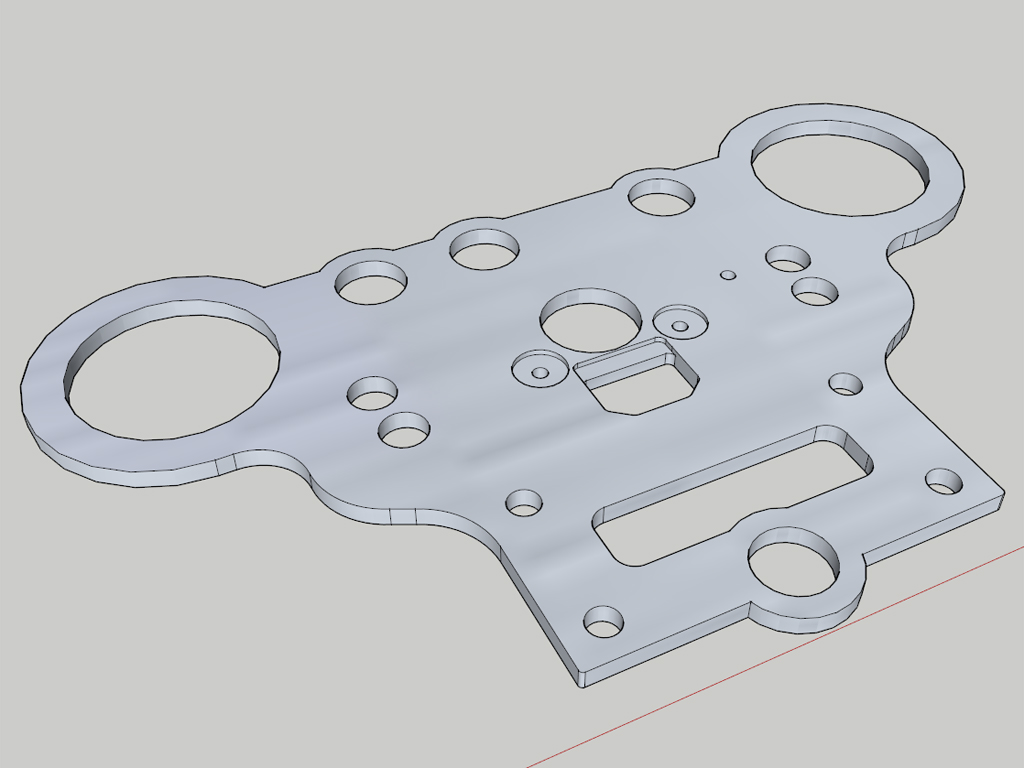
Blog / Parts

Posted on 22 May 2014 at 10:46 pm (CET)
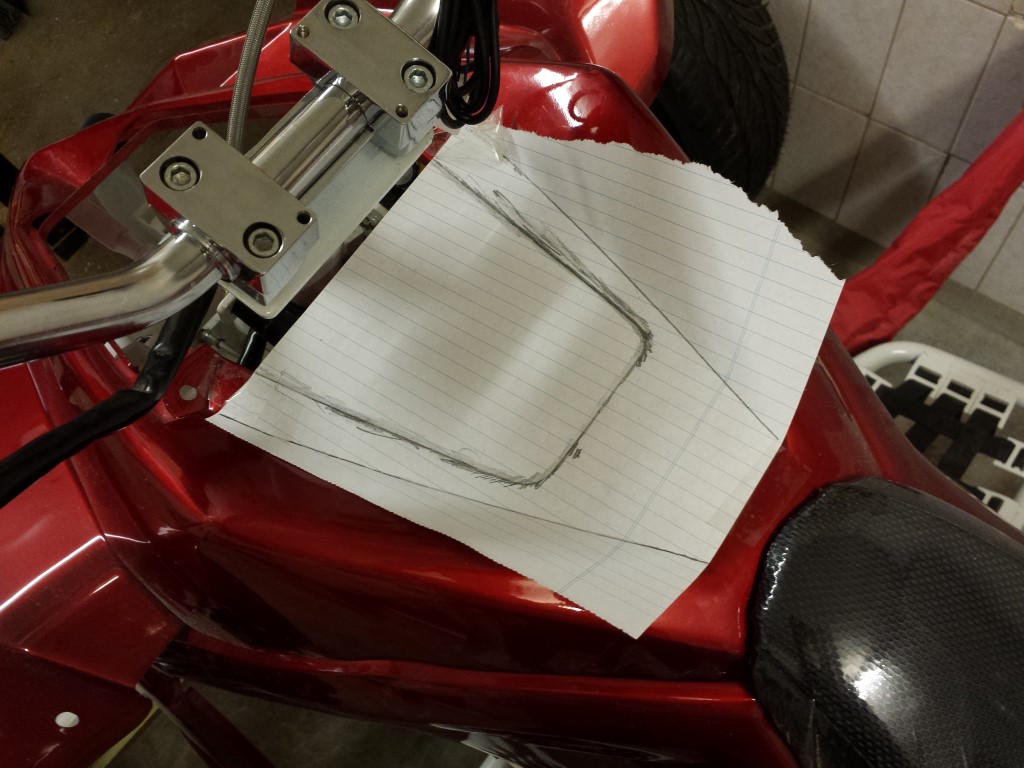
I've made some drawings again. These will probably be the last 2 aluminium parts that still have to be made. First is a mounting plate for all the gauges and switches. This will be mounted on the handlebar.
As usual I made a paper model of it to see how everything would fit.
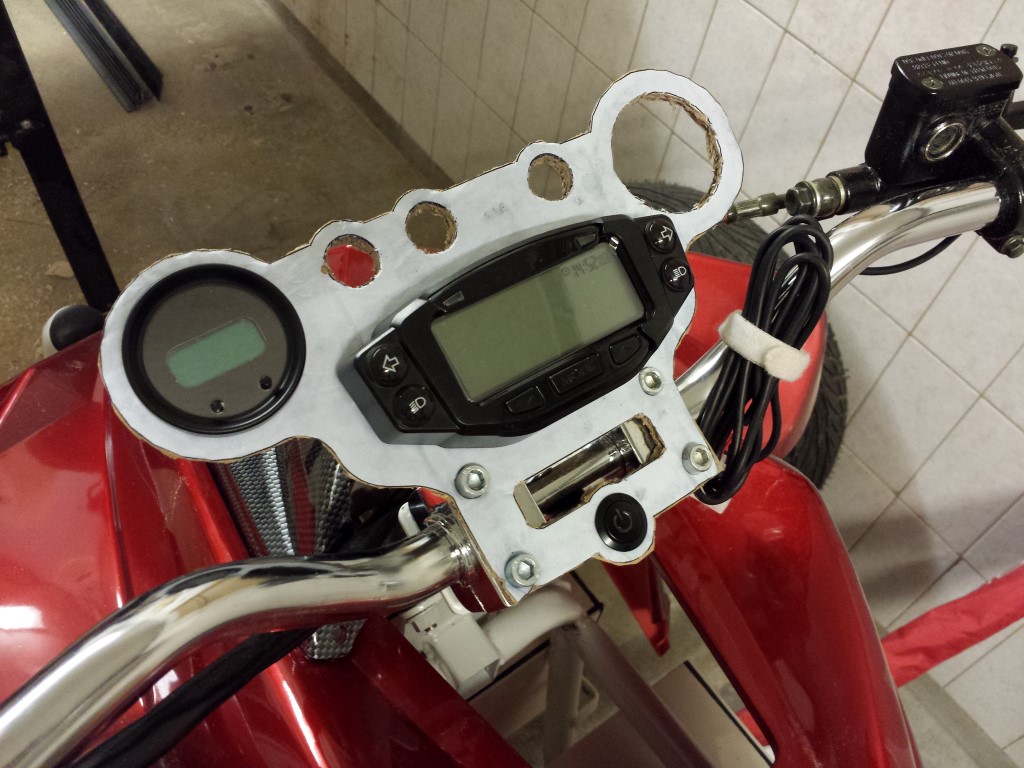
It all fits pretty good, just the angle of the gauges isn't really that great. Would be better if the plate could be bent to an angle of about 20 degrees, would be looking straight at the gauges then when sitting on the quad bike. I modified the drawing a bit to make this possible. Also made some small changes to make it easier to route and added another hole for the hazard lights switch. The plate will be bent by about 20 degrees on that line in the middle.
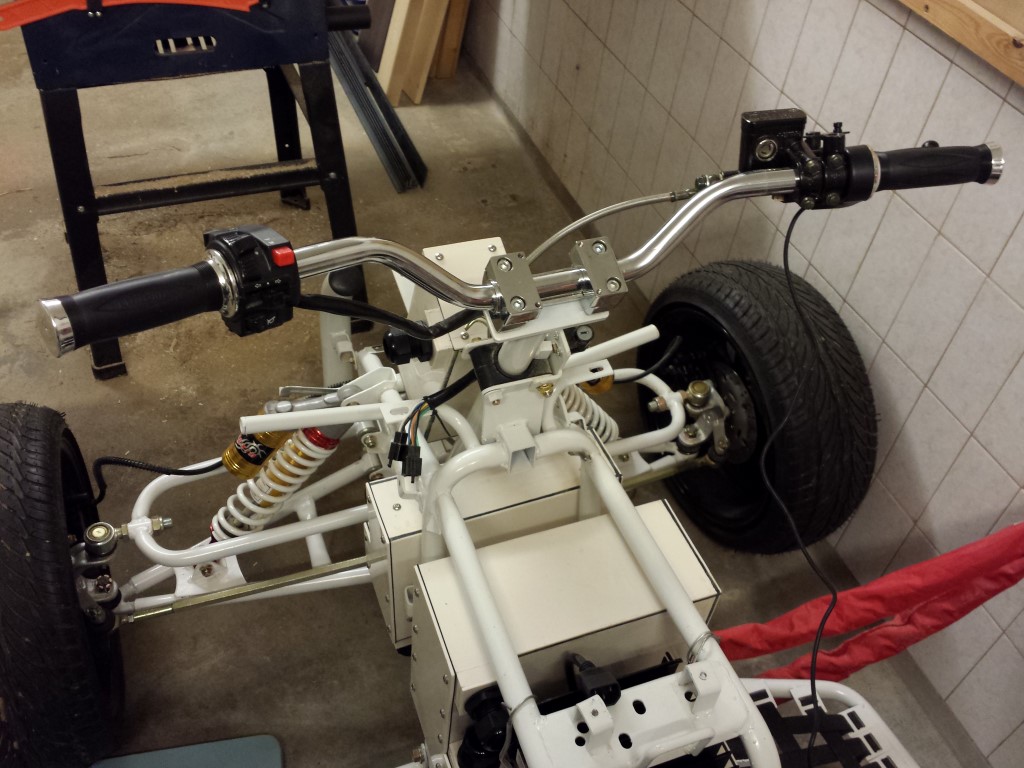
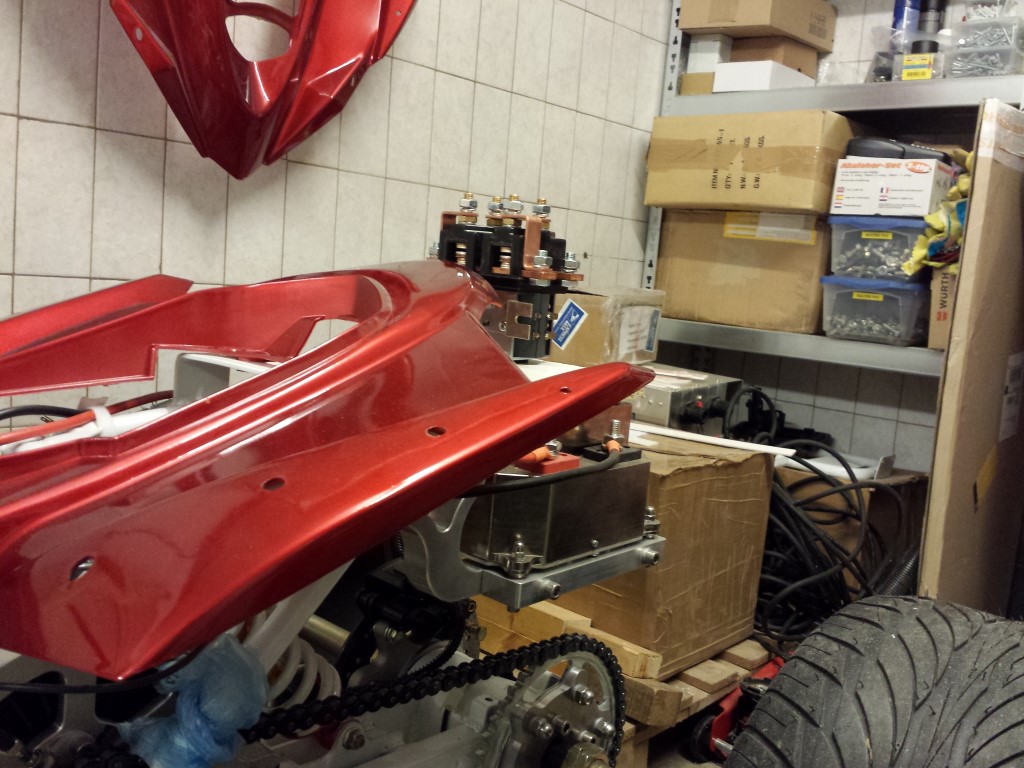
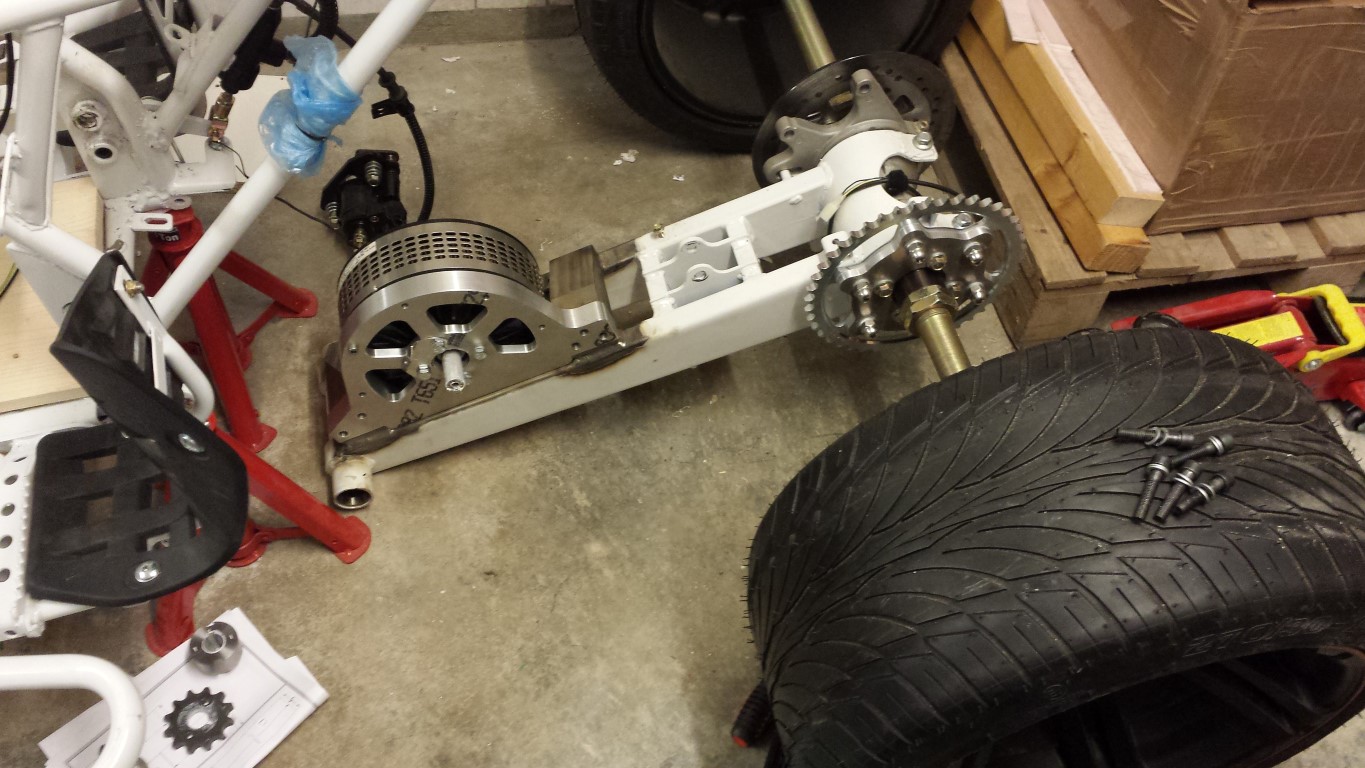
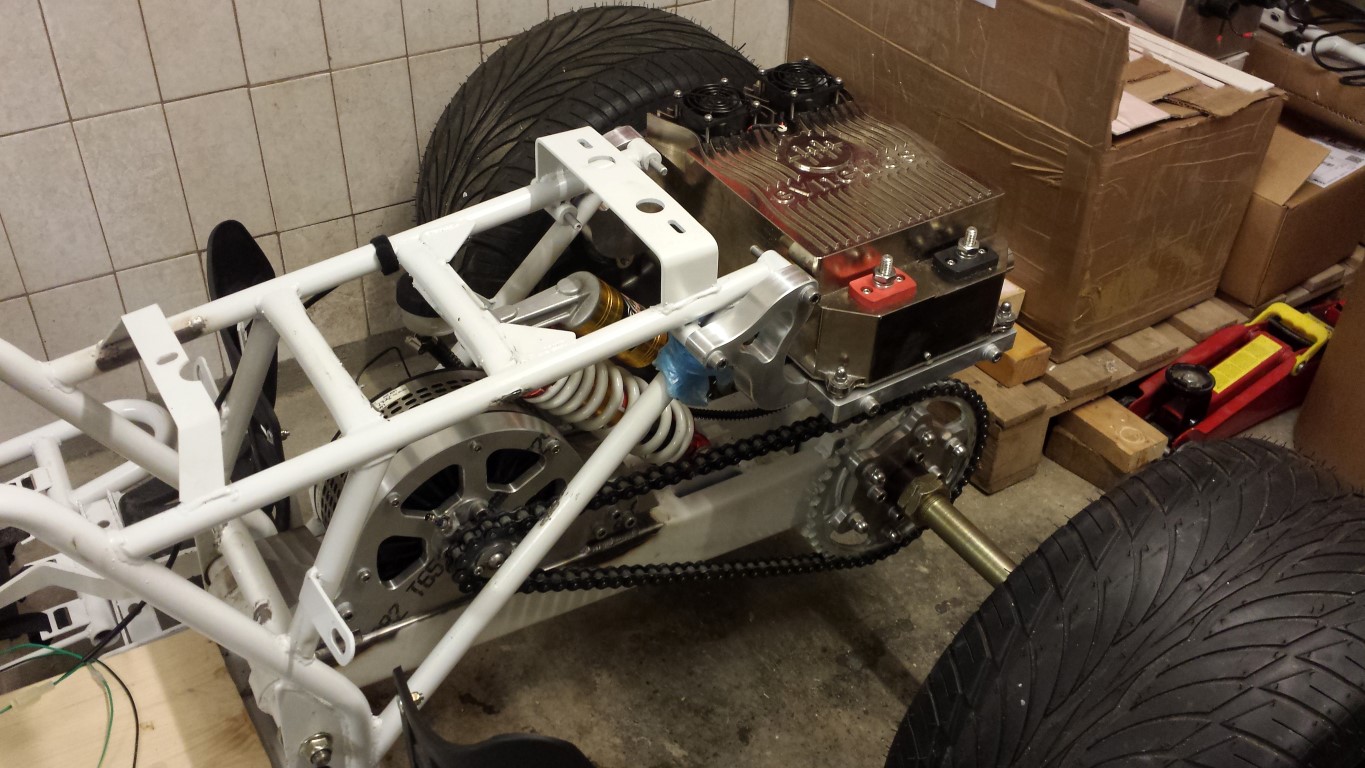
To be able to measure a few more things I had to place the fenders again. So here's a nice picture of the whole quad bike. It's actually starting to look like something.

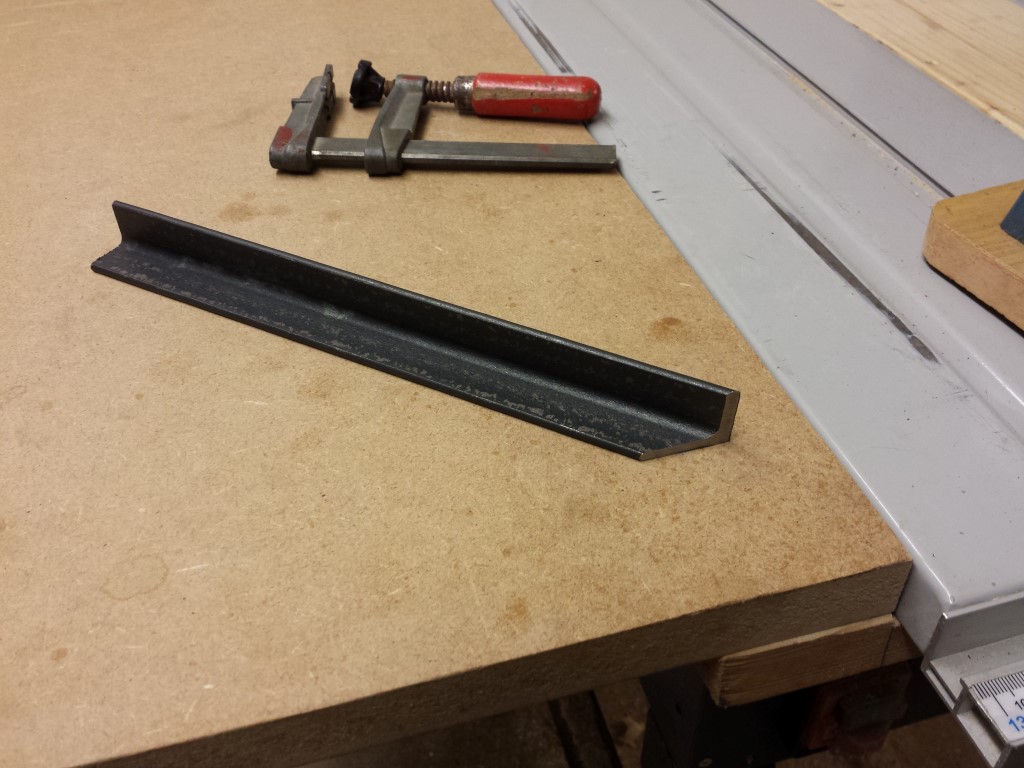
I just ran into a problem with the battery box that's in the front below the carbon fender. It barely doesn't fit and the box is being pushed against the steering shaft which isn't a good thing. So I'll have to modify this box a bit, make it beveled on one side. Because of this I also haven't been able to saw the steel corner profiles to size yet since they'll have to be different for this box as well.
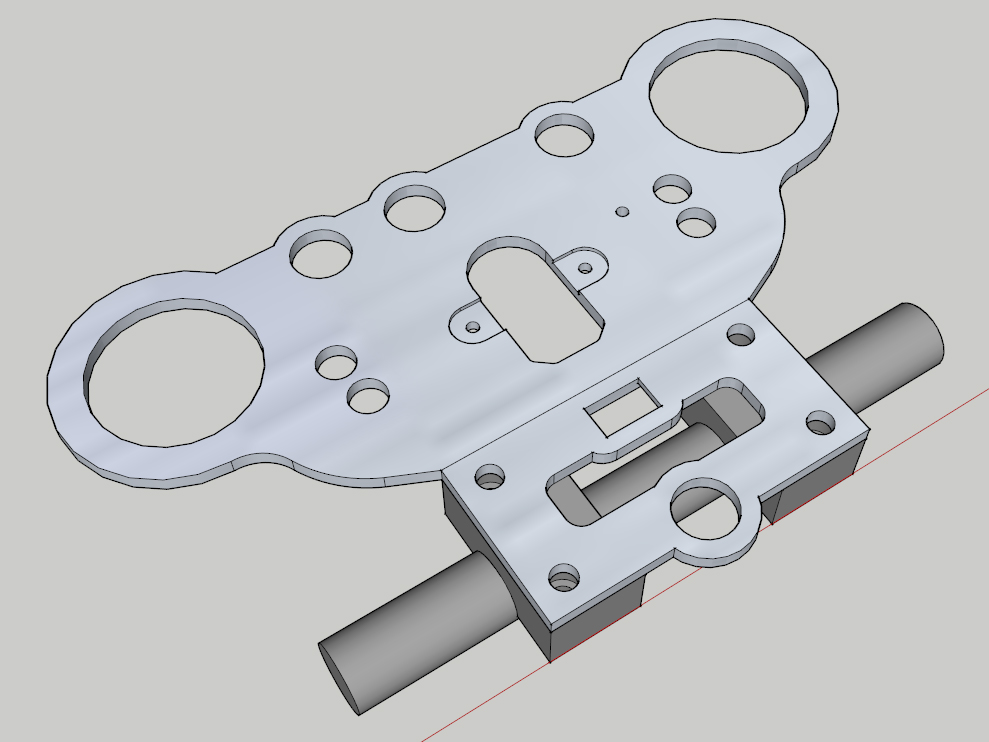
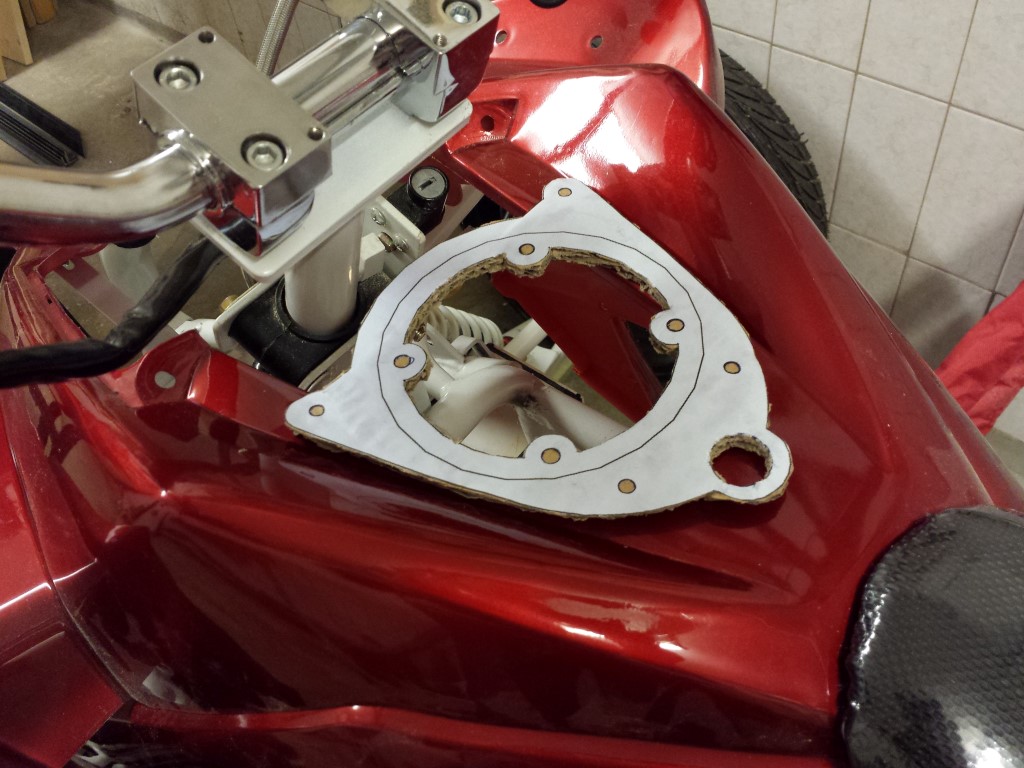
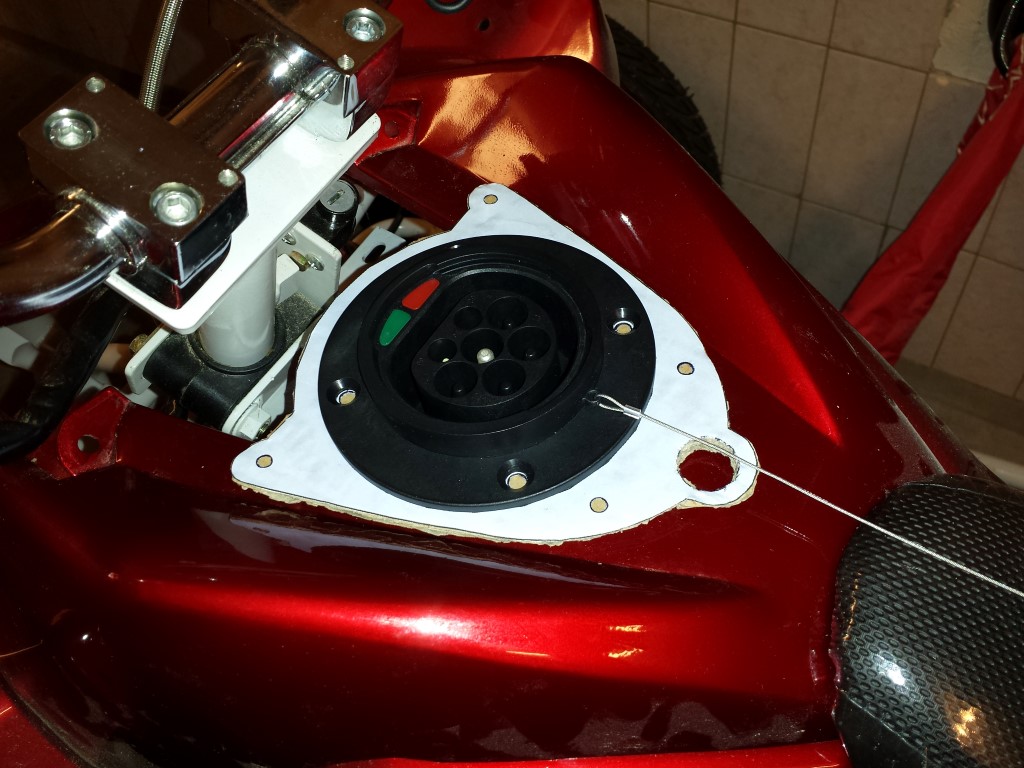
Then there's still the other plate. This one's for the charge inlet and will be in the same spot where the gas filler cap once used to be. For this I needed all the sizes of the fender which is quite tricky since the lines aren't straight but bent just slightly. I had the idea of just sticking a piece of paper on it and then try to find the lines with a pencil, worked pretty well.
Now I could easily measure everything while drawing without having to take the whole fender with me.
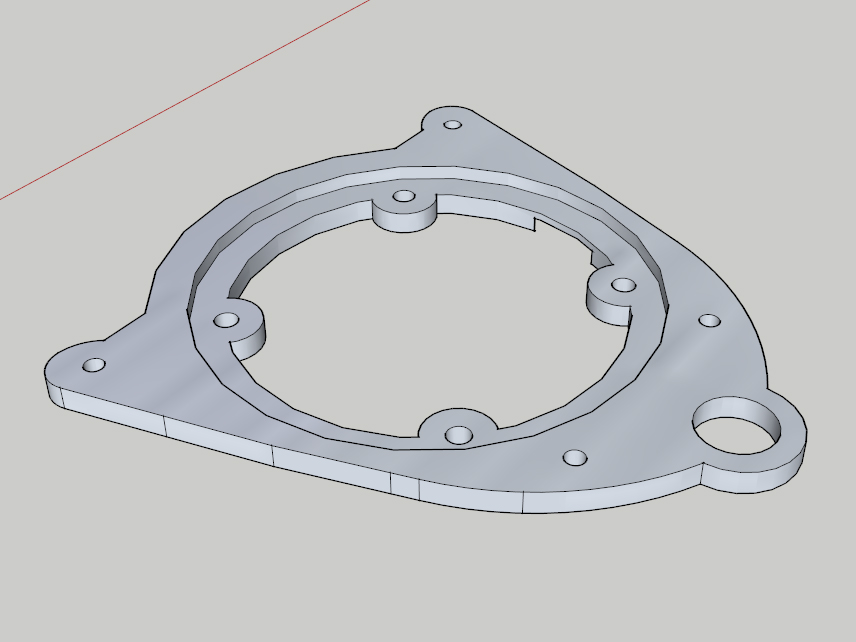
I again made a paper model of it and it all fits perfectly, no modifications needed.
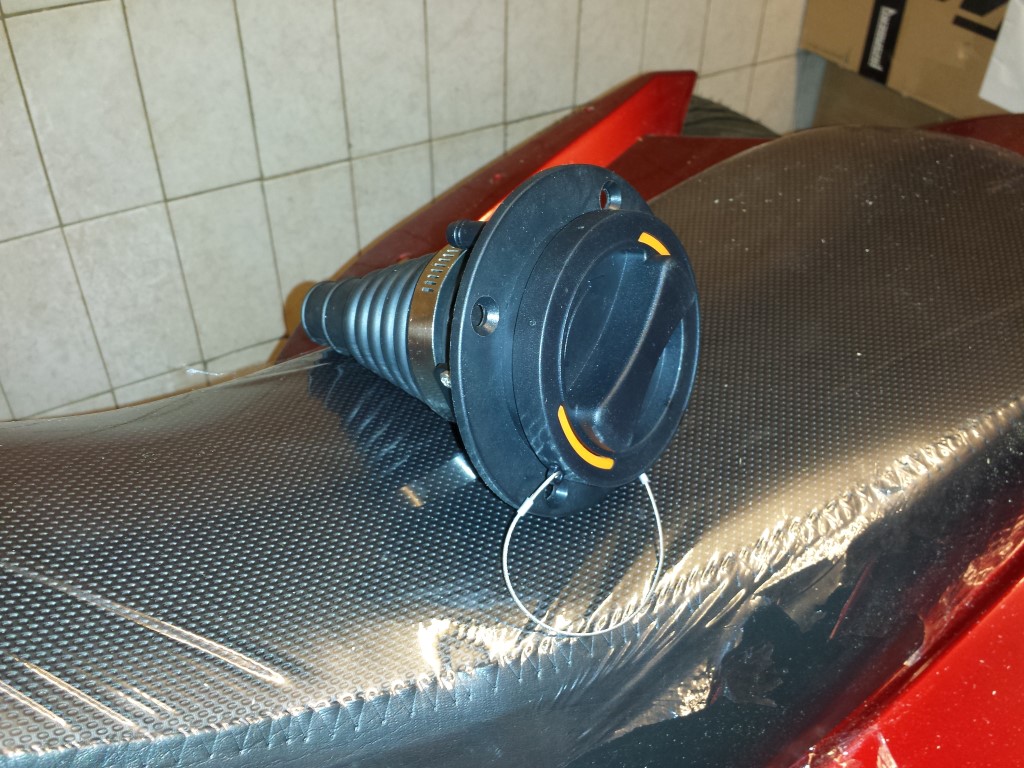
The charge inlet is new after some advice from Rebbl, this is a mode 3 type 2 (IEC 62196). It's the standard everywhere in Europe now for all electric vehicles. Last year or so I already bought a CEE inlet but meanwhile this won't be approved anymore at the RDW (our institute for road safety). So unfortunately I had no choice but to buy this one. But I'm quite happy with it now, it's much more solid, safer and also waterproof.
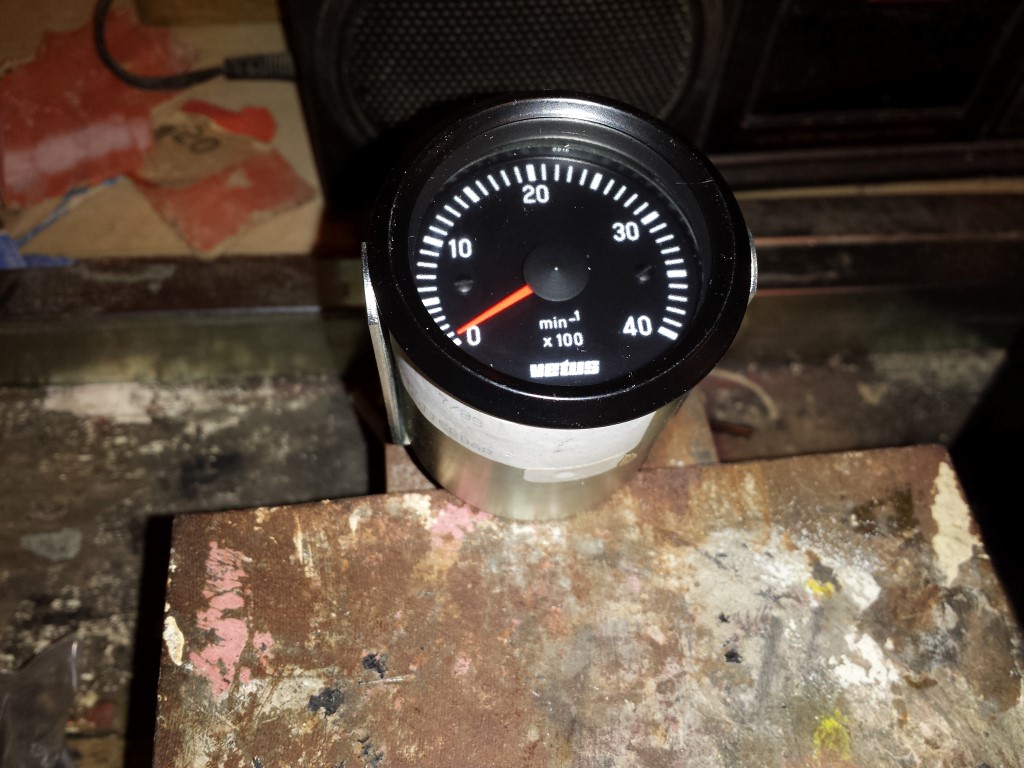
Also bought a new analog tachometer for a very cheap price. But unfortunately I can't get this one to work either. I was really sure it would work with this one since it normally gets connected to the alternator and also gets a pulse signal. But it doesn't do anything with the pulse signal that's coming from the controller. So I'll have to look for a solution again.

Posted on 16 May 2014 at 01:26 am (CET)
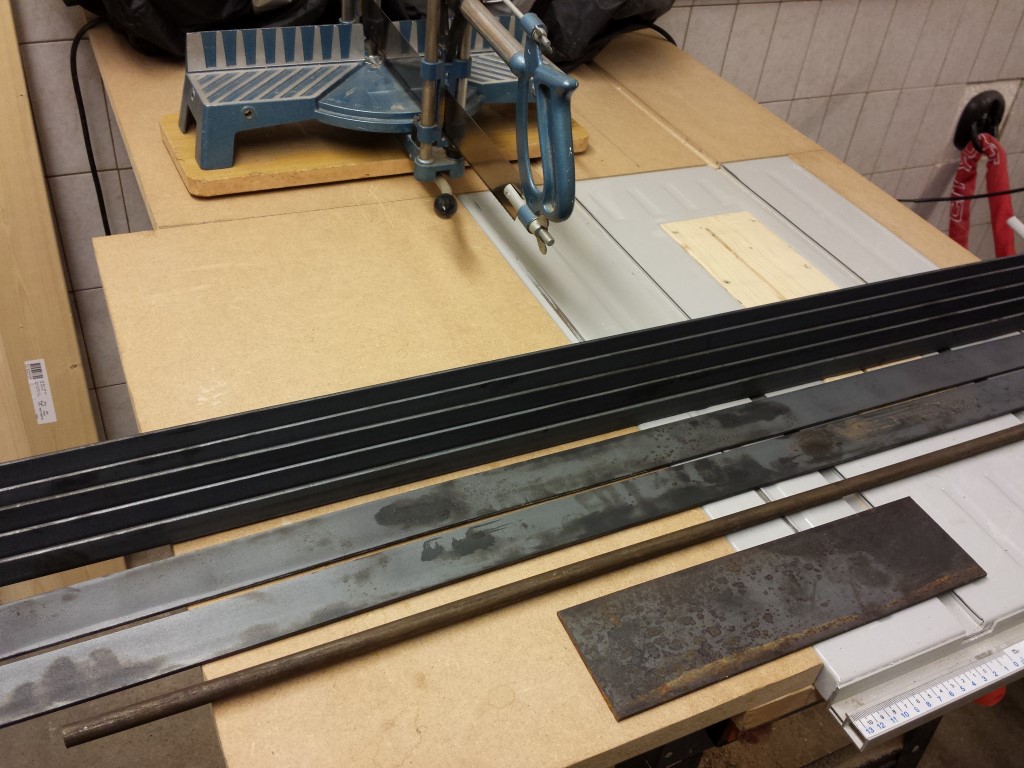
Another small update. A few days ago I already got the steel corner profiles, strips and a plate for the battery boxes and charger. It weighs quite much all together. Wanted to try and saw this by hand with a mitre saw but after half an hour I only sawed one profile so I stopped. Meanwhile I've bought an electric mitre saw which can be used for wood, aluminium and steel, will always be worth it's money that way. Tomorrow or this weekend I'll be able to continue again with sawing the profiles.
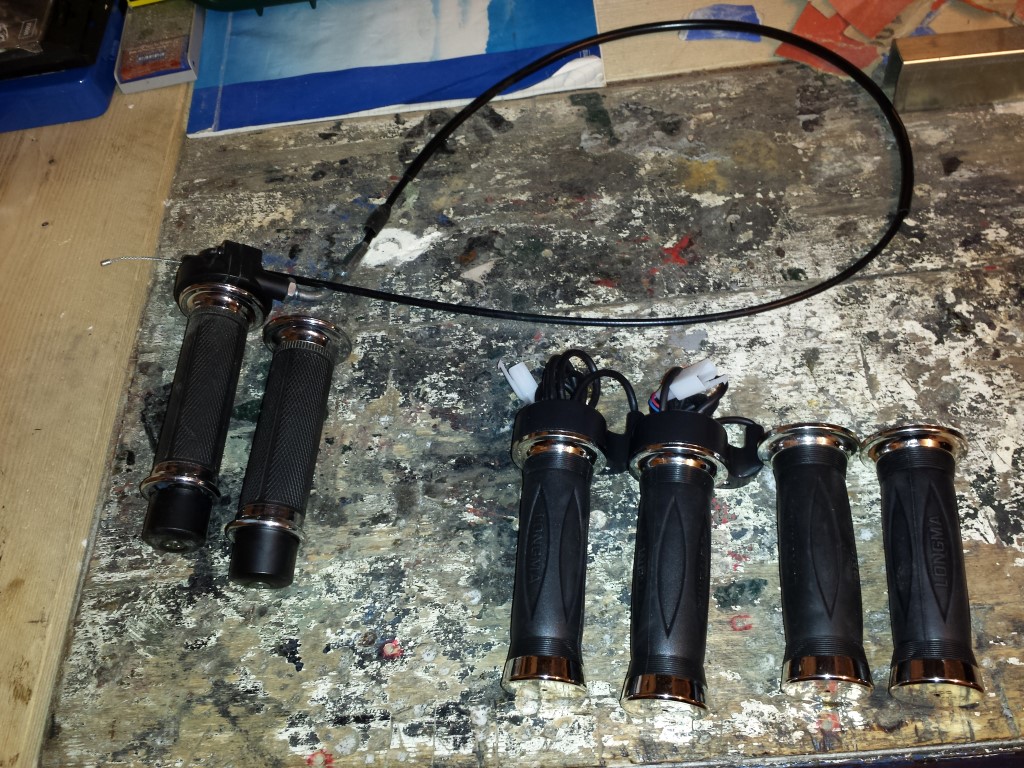
But that wasn't all yet, I also went shopping on Ebay (will have to be careful with this, already seen many nice things) and got a new throttle with grips. Not to make it look better or anything like that because they look pretty much alike and are still Chinese but this is one with a hall sensor built in. Now I won't have to use the seperate potentiometer anymore where the throttle cable was attached to. And also won't need a throttle cable anymore. That's probably the best thing because I still remember really well from my scooter era how annoying these throttle cables can be when they suddenly break. Now there's a cable going straight from the throttle to the controller, or like they call it drive-by-wire. They're a bit shorter than the original and closed on the outside so everything's moved a bit more towards the ends of the handle bar. Will have to wait and see if I like it this way, otherwise I could just cut off a small part of the handle bar on both sides. Also bought a 2nd set of these as backup, they're still Chinese ofcourse. Was pretty cheap anyway.
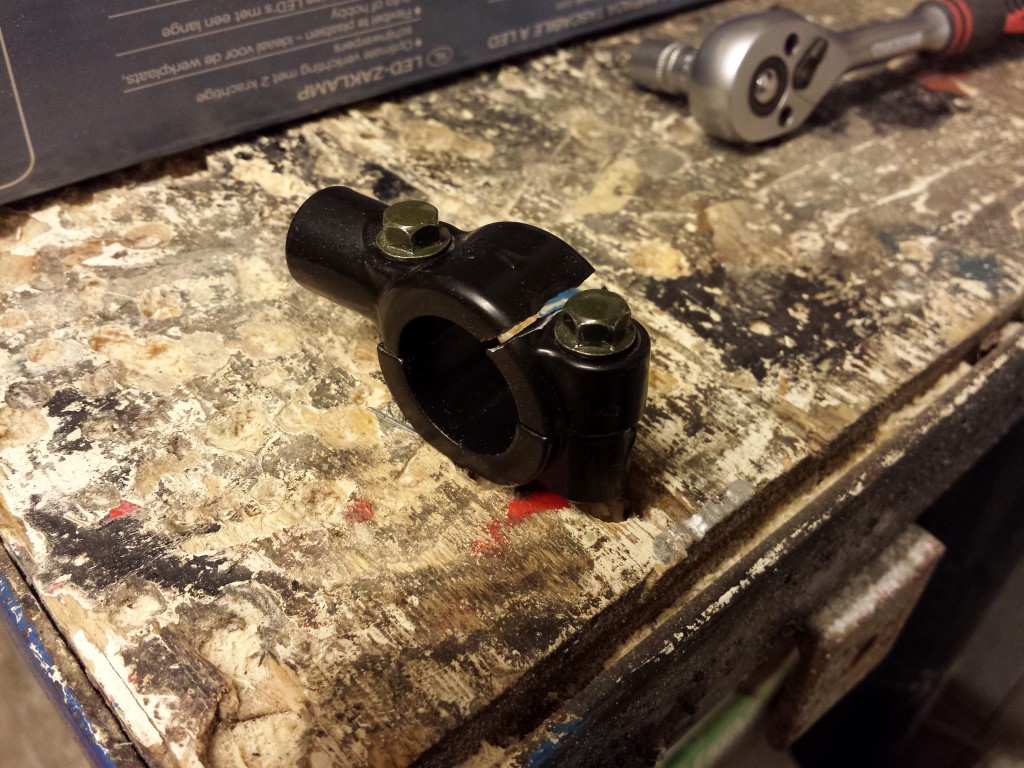
I also wanted to move the mounting points for the mirrors a bit, it went well on one side but on the other side not so much. This is what happens when you overtighten them just slightly.
Also received a new digital dashboard today. Trail Tech Striker with seperate dashboard around it and a seperate tachometer.
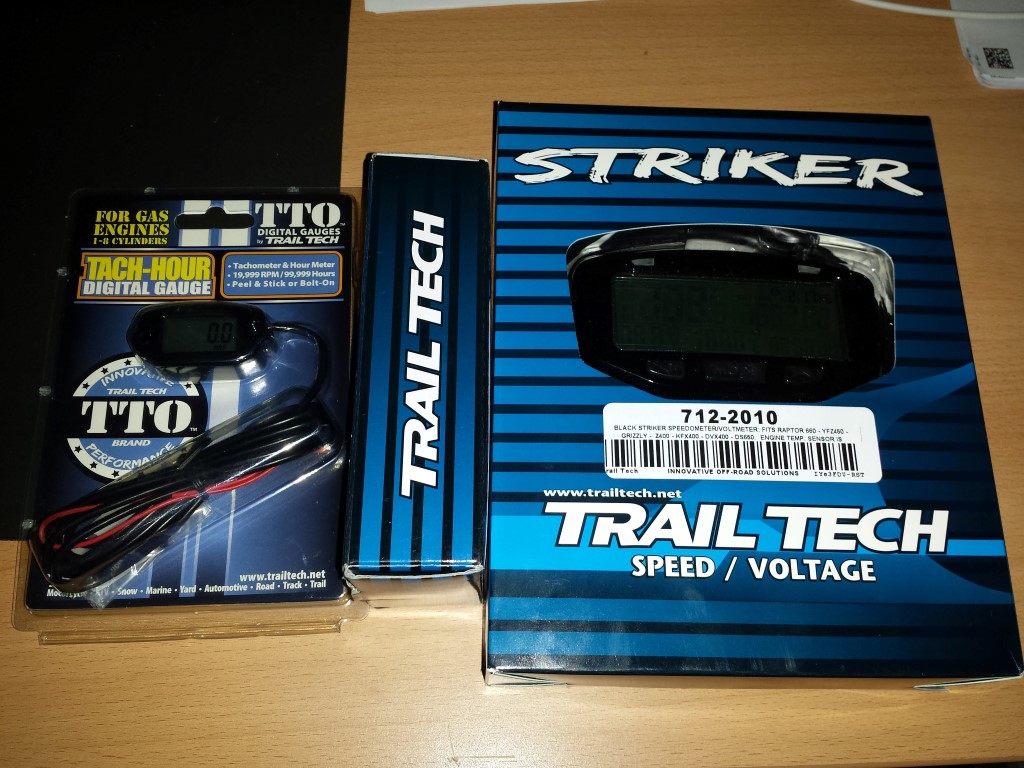
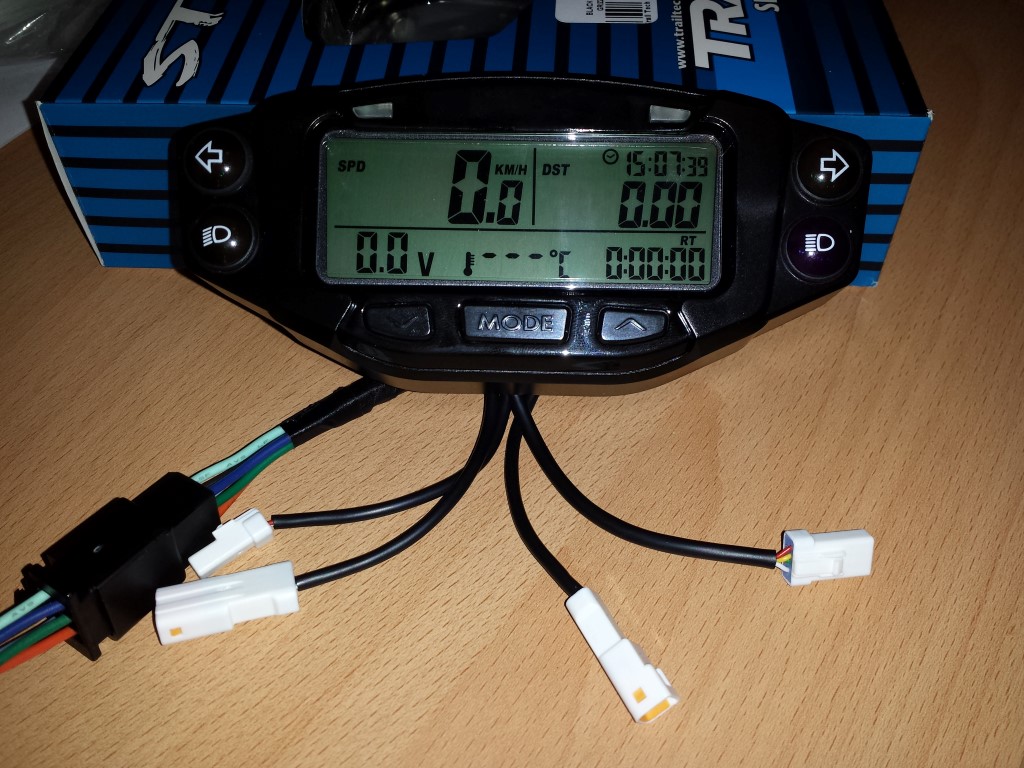
It all looks nice and it's quite a bit smaller than I thought it'd be. But today I also tested that seperate tachometer and unfortunately it doesn't work. Normally its wire just gets wrapped around the spark plug lead to get the pulse signal but this can't be done with mine. The controller does have a function to pass on the pulses of the RPM sensor but when I connect to tachometer to this it unfortunately doesn't do anything. Already contacted Trail Tech about this en according to them this indeed can't be done since it's inductive and needs high voltage (like with an ignition coil). So I can't do anything with this unfortunately. Will have to see if I can send it back. The Striker dashboard I still haven't been able to test yet but I don't expect any problems with this, should all work well.
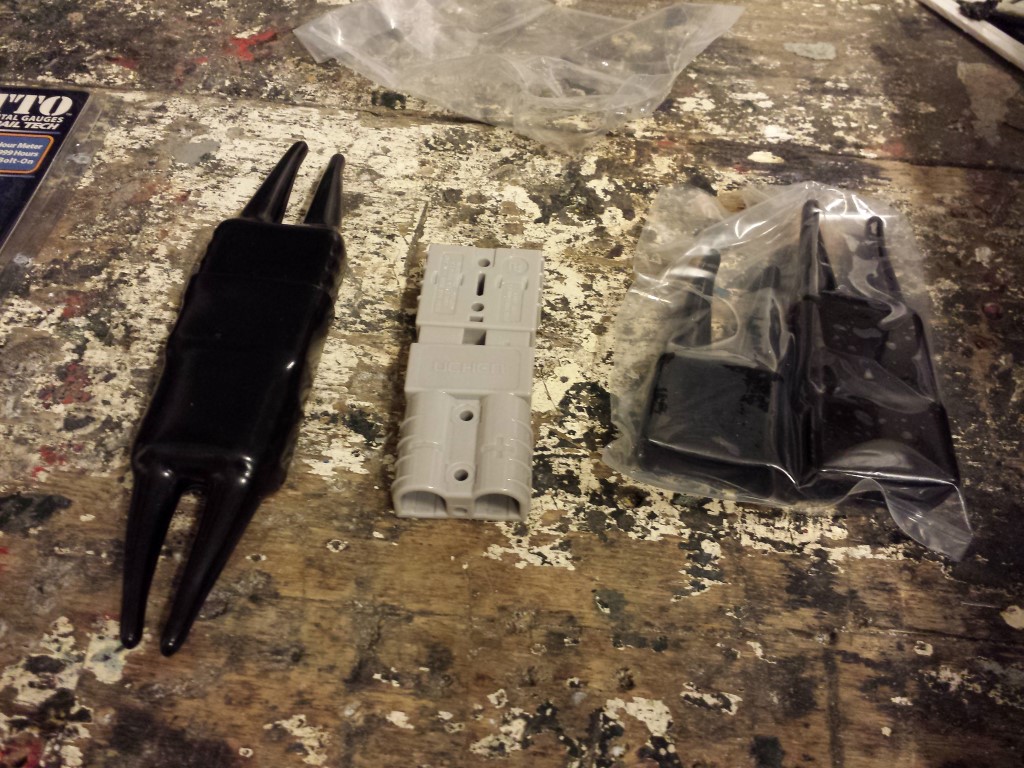
On Ebay I also still found some rubbers that go around the connectors for the charger and DC-DC converter. This way it'll all last a bit longer again if no water/moisture can enter.
Today I also found out that I received the wrong contactors a year ago (for reverse and another one to turn on and off). I ordered them for 72V with 12V coil but instead I now have them with 72V coil. No idea how this could have ever gone wrong because what use is a 72V coil when you're actually switching 72V as well? Seems pretty obvious that this should've been 12V but oh well. Going to contact that company where I bought them from and see what they can do. That was about it for today.
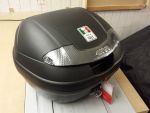
Today I got something new, a top case. And to make the quad bike even more international I added some Italian flavour. It's a Givi E340 Vision Tech.

They also had one with a red reflector but I think this matches better with the rear light. Might still add some leds to it some day as an extra brake light.
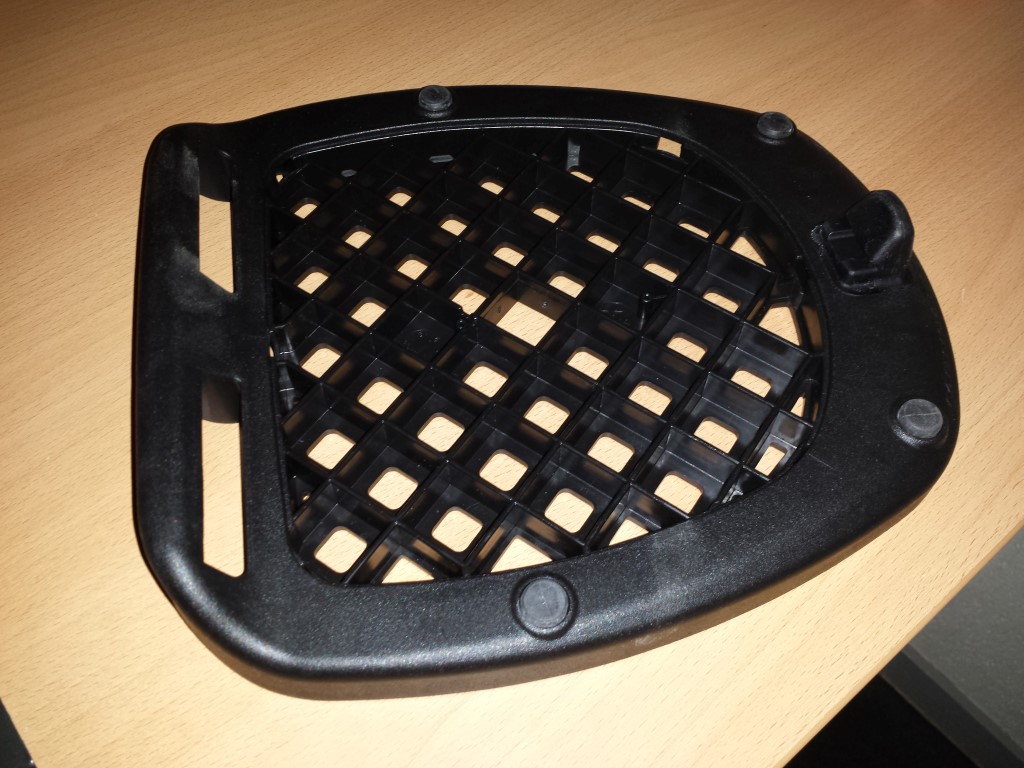
This plate came with it for attaching the case. I'll first have to make a drawing again and have some mounts made so I can attach this plate and the rear light + signal lights.
Now you might be wondering why I'm already busy with accessories while the quad bike isn't even drivable yet. But this top case won't just be for storage. I have these 2 contactors to be able to drive forward and in reverse but I had no idea how to place them properly.
I ofcourse could build some enclosure again but I don't think this would look good since it's a rather big part so it sticks out pretty much. The plan now is to just place this in the top case, this way I'll have an enclosure that's already water and dirt proof and also some extra storage. Might also place the 12V battery and other electronic parts in here, at least I won't have to find some space in the frame then.
I'm also looking if I can mount the license plate at the bottom behind the bearing house. But I'm waiting for the RDW to confirm if this is allowed. The rules state that it should be mounted at the appropriate place. But well, what is that exactly? Not really very clear is it. But I think it would be a nice position for it, the controller would be visible from behind as well then. Otherwise the license plate would be in front of it.
Posted on 19 September 2013 at 09:43 pm (CET)
Category: Parts
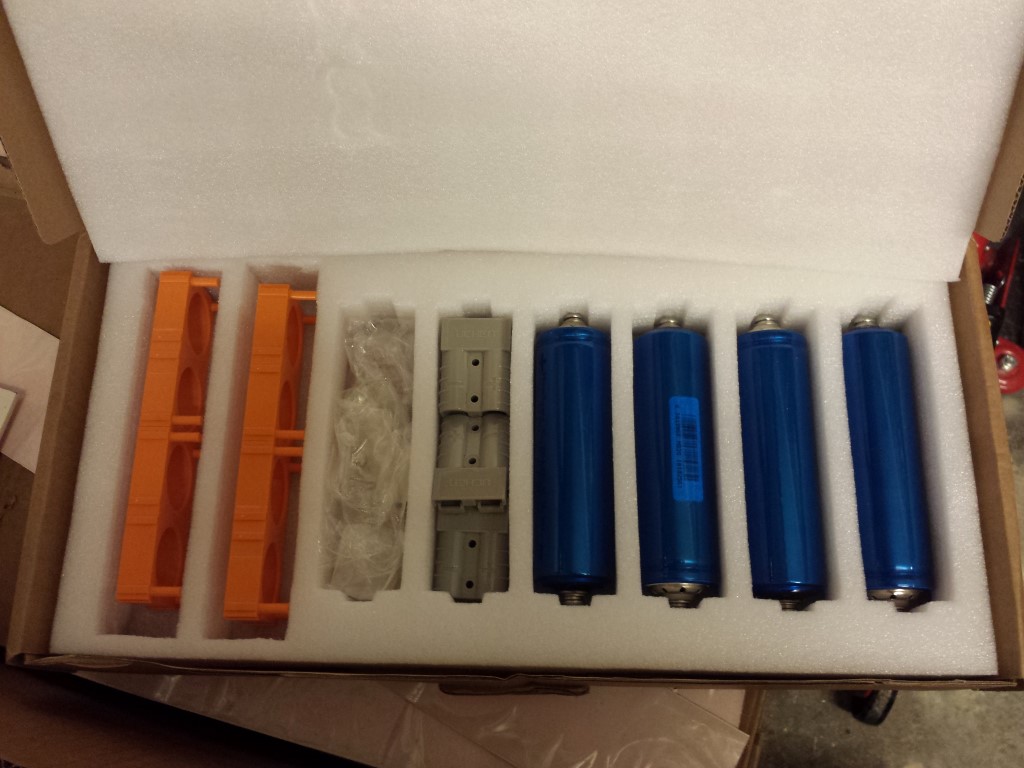
Today I received another package from England.
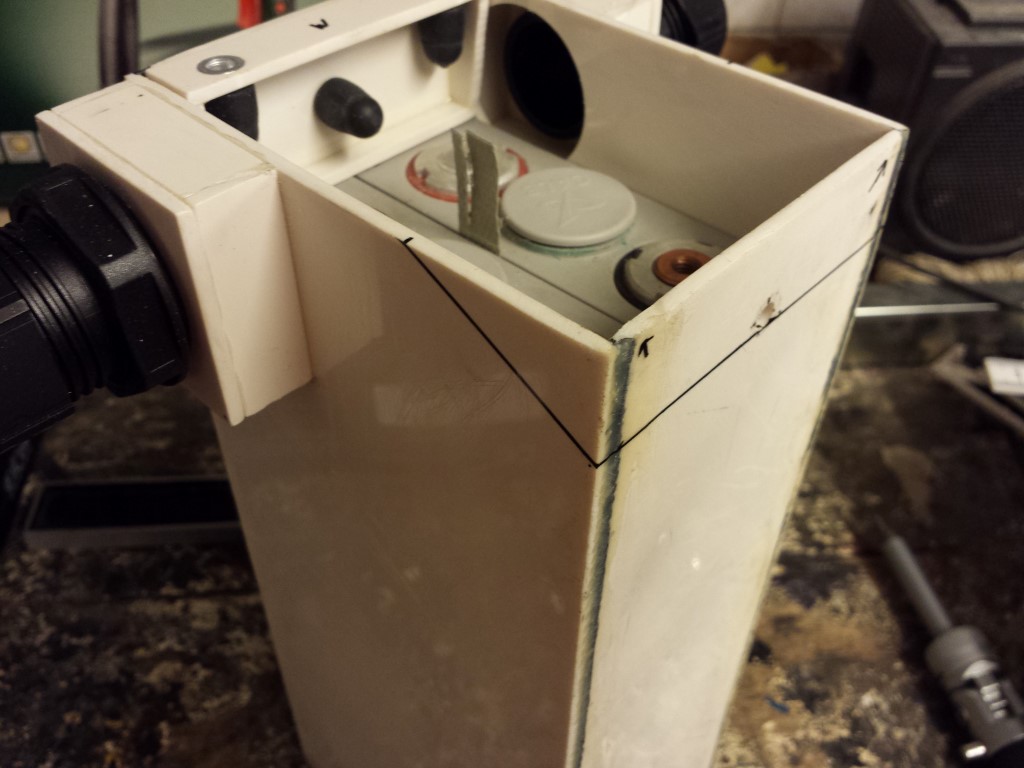
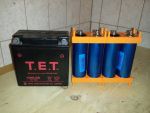
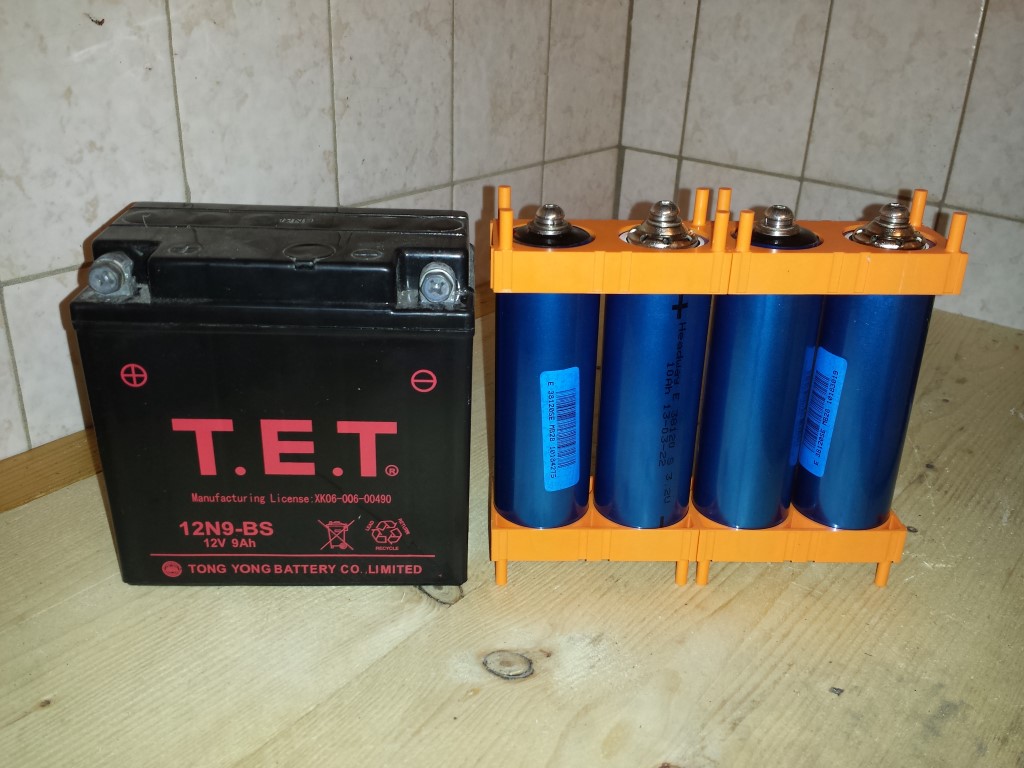
They are 4x 3.2V 10Ah batteries. Same kind as the batteries used for the propulsion (LiFePo4) only smaller and round. As replacement for the original 12V battery. Everything's included to put it together and connect in series. Also 4 50A connectors to be able to easily unplug the charger and DC-DC converter. All pretty hard to get here in the Netherlands.
Here you can see some comparisons with the original battery. The original one is 12V 9Ah, the new one is (in total) 12V 10Ah. Weight differs quite a bit too, original is 2,8 kg. This only 1,4 kg, so half of the weight.
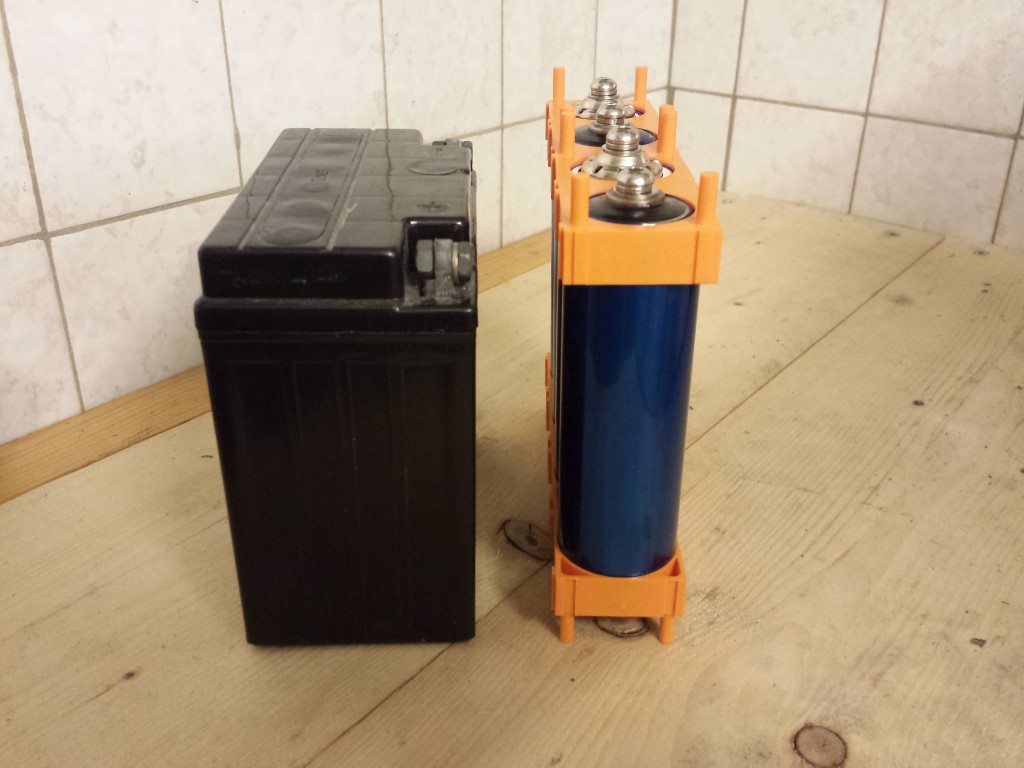
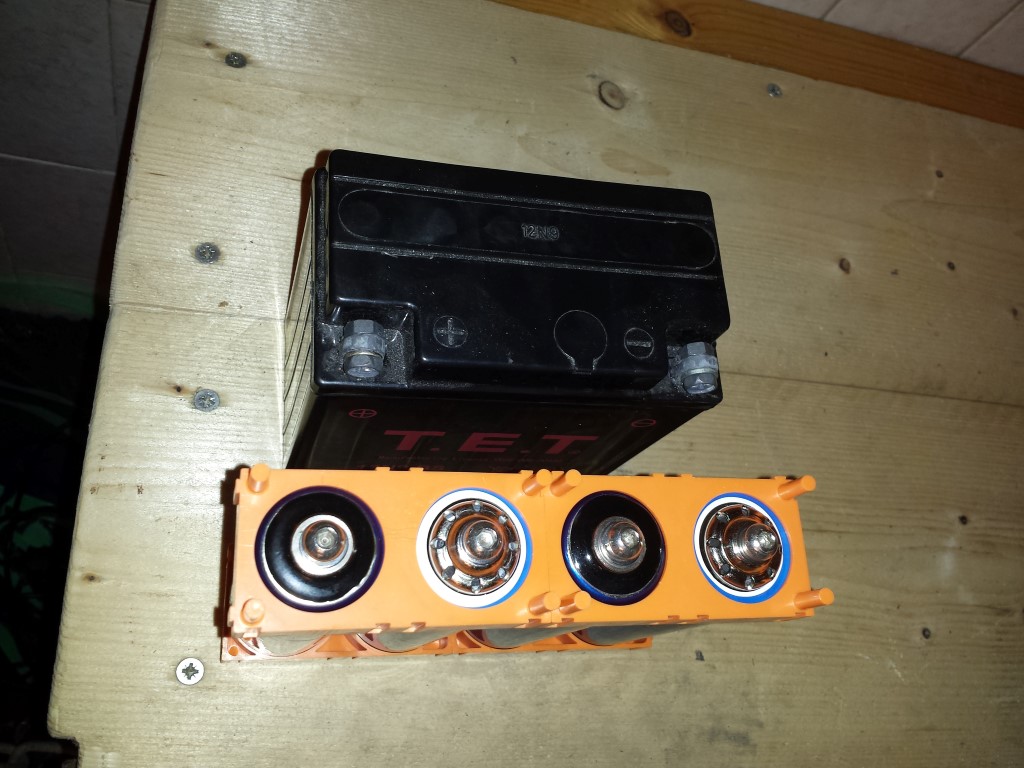
It just doesn't fit in the space I had in mind, but can place this anywhere really so it'll be all good. Can also make a square of it or an L shape.
Posted on 13 September 2013 at 12:28 am (CET)
Posted on 13 September 2013 at 12:28 am (CET)
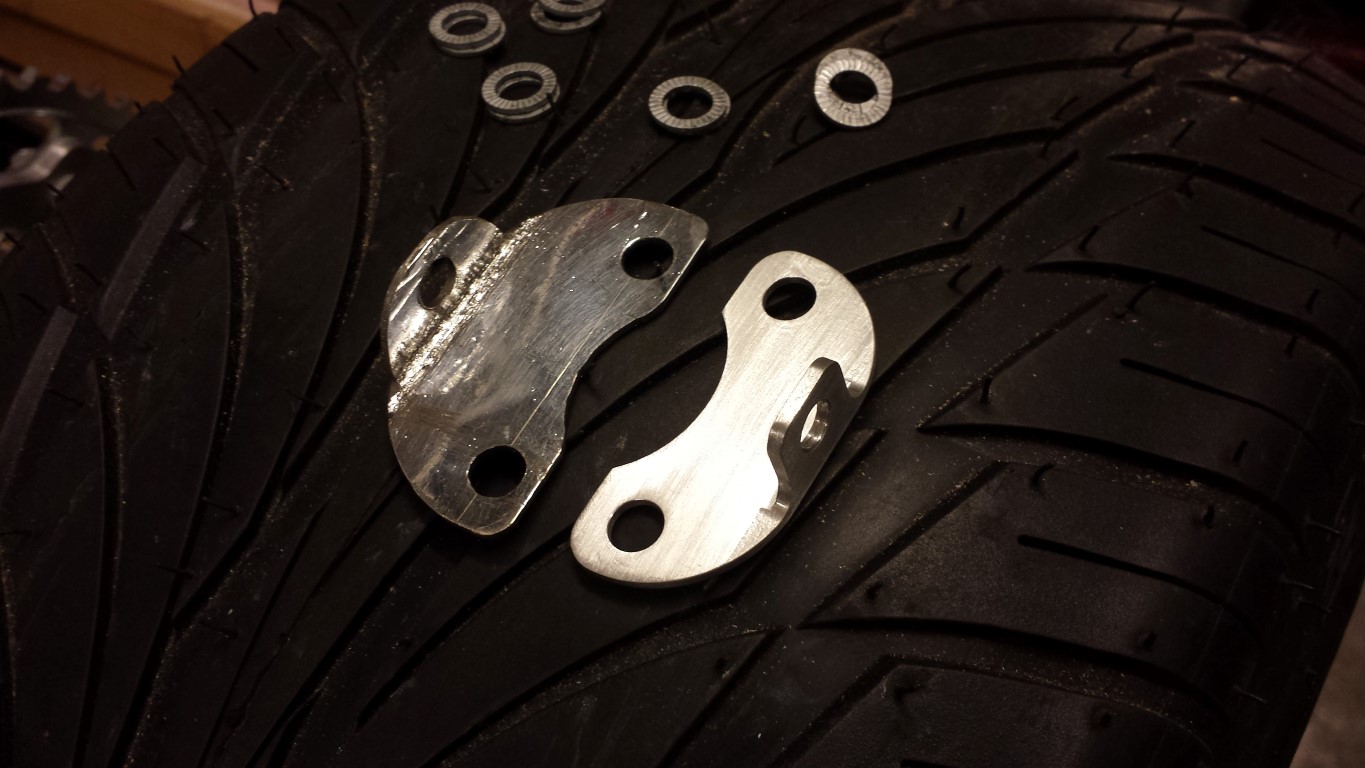
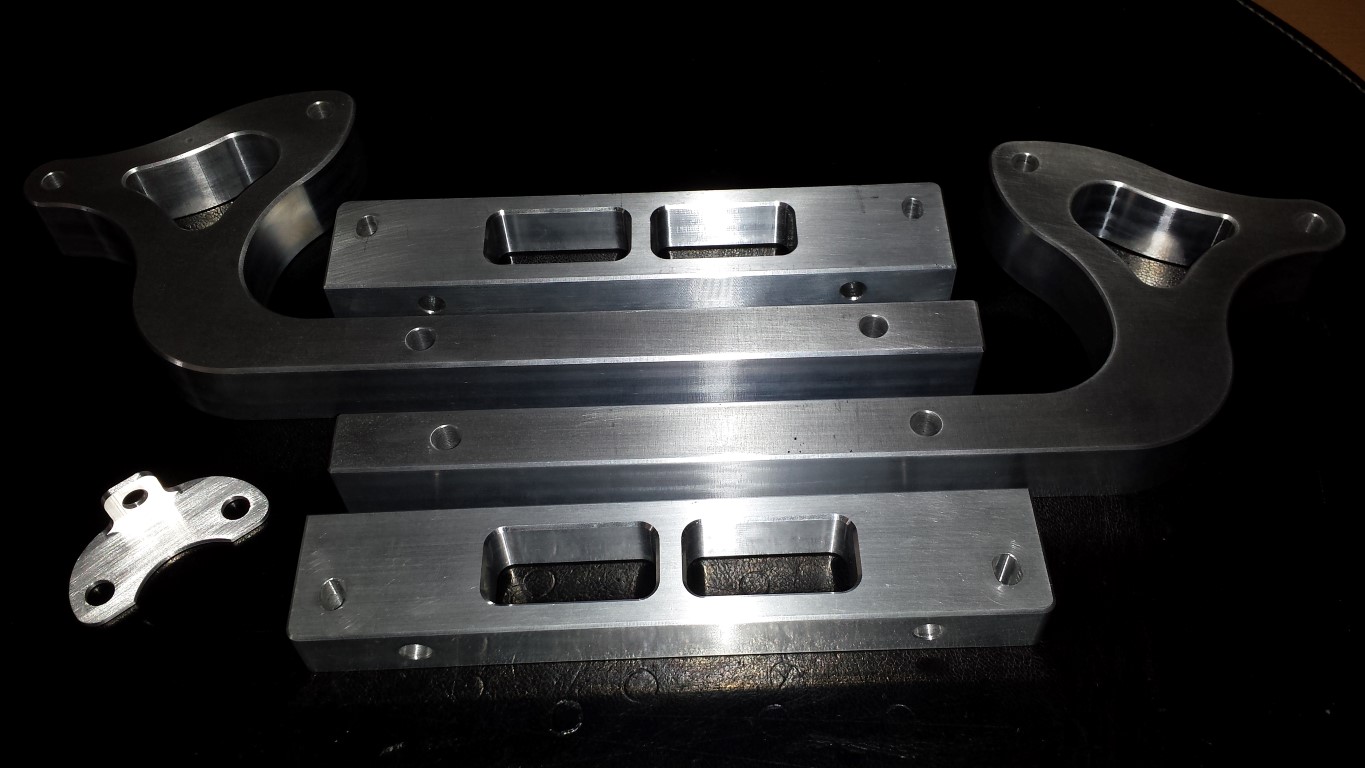
Very good news today, the mounts for the controller and a new plate for the RPM sensor are done and also fitted them already. Been working on it for the whole evening. I do have to grind off 2 mounting points on the frame though since the mounts are pointing inward a bit. But it's an easy fix, will do it tomorrow. Couldn't make any noise anymore here so late in the evening.
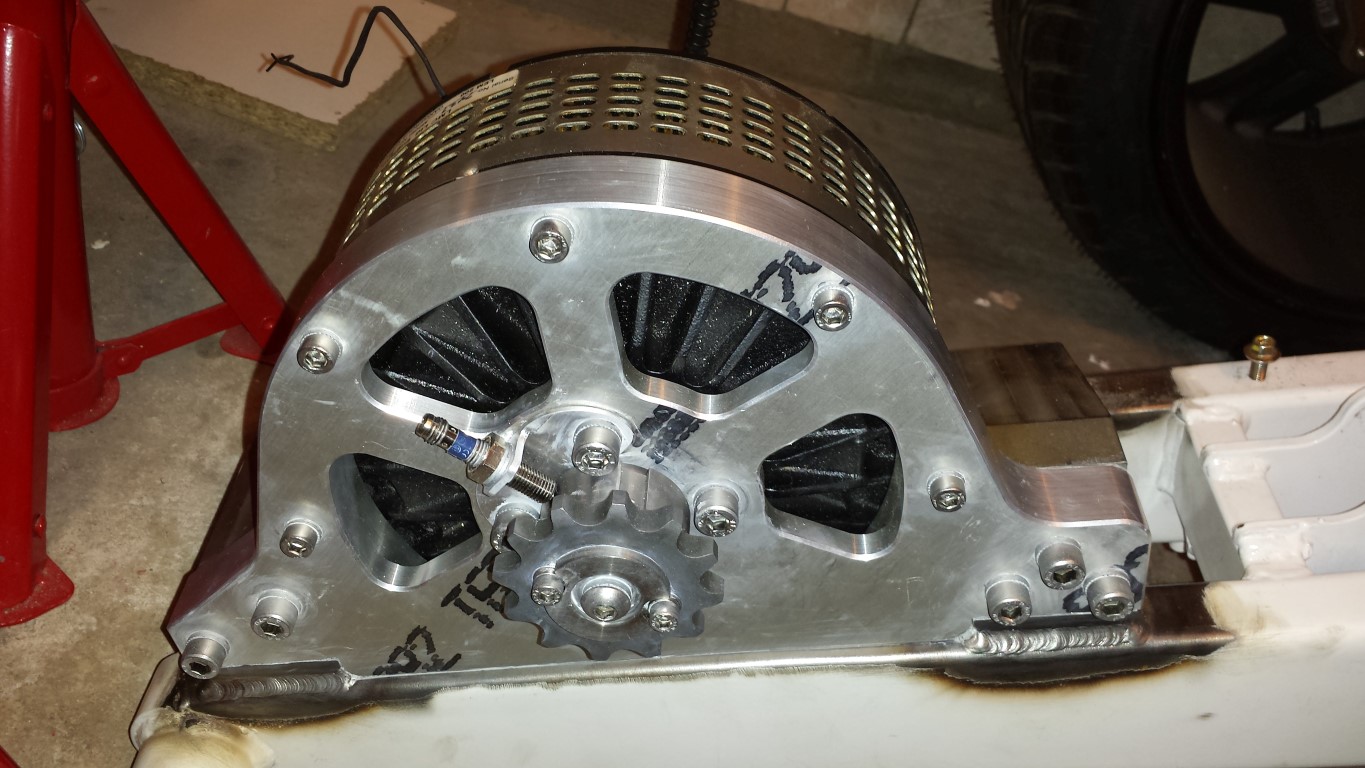
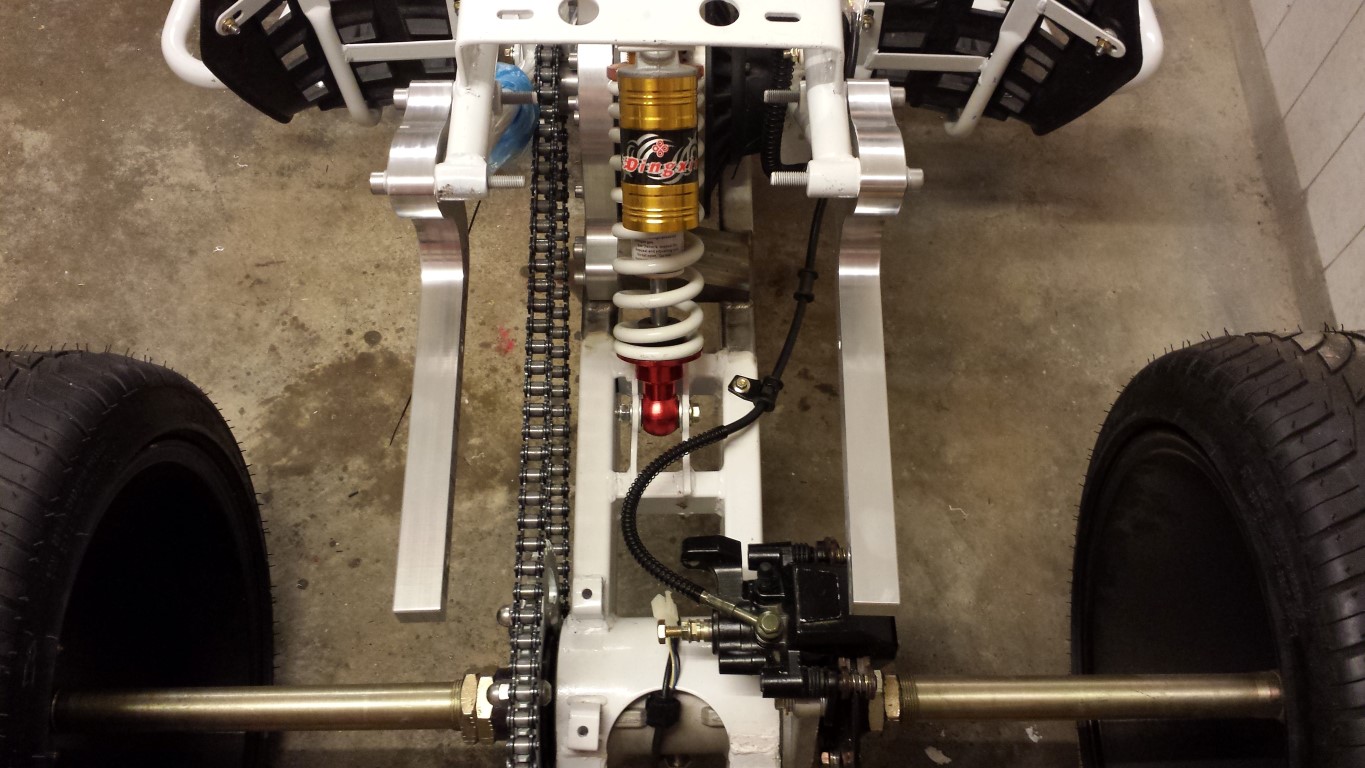
First off I removed the rear swingarm again so I could place all the new stainless steel bolts on the motor mount and to place the new plate for the RPM sensor.
Difference between my own handmade plate and the new plate for the RPM sensor. Makes mine look pretty bad.
Here are all the stainless steel bolts in the motor mount and the plate for the RPM sensor fitted.

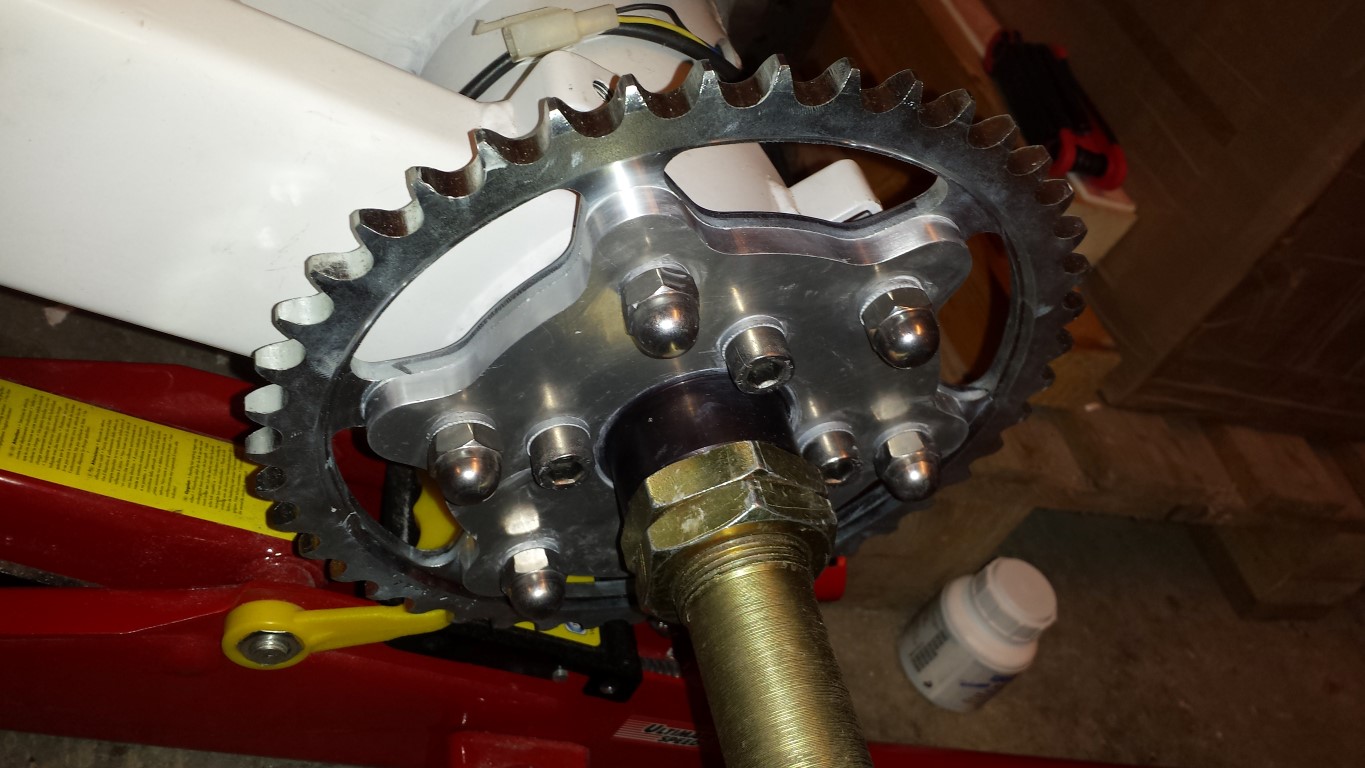
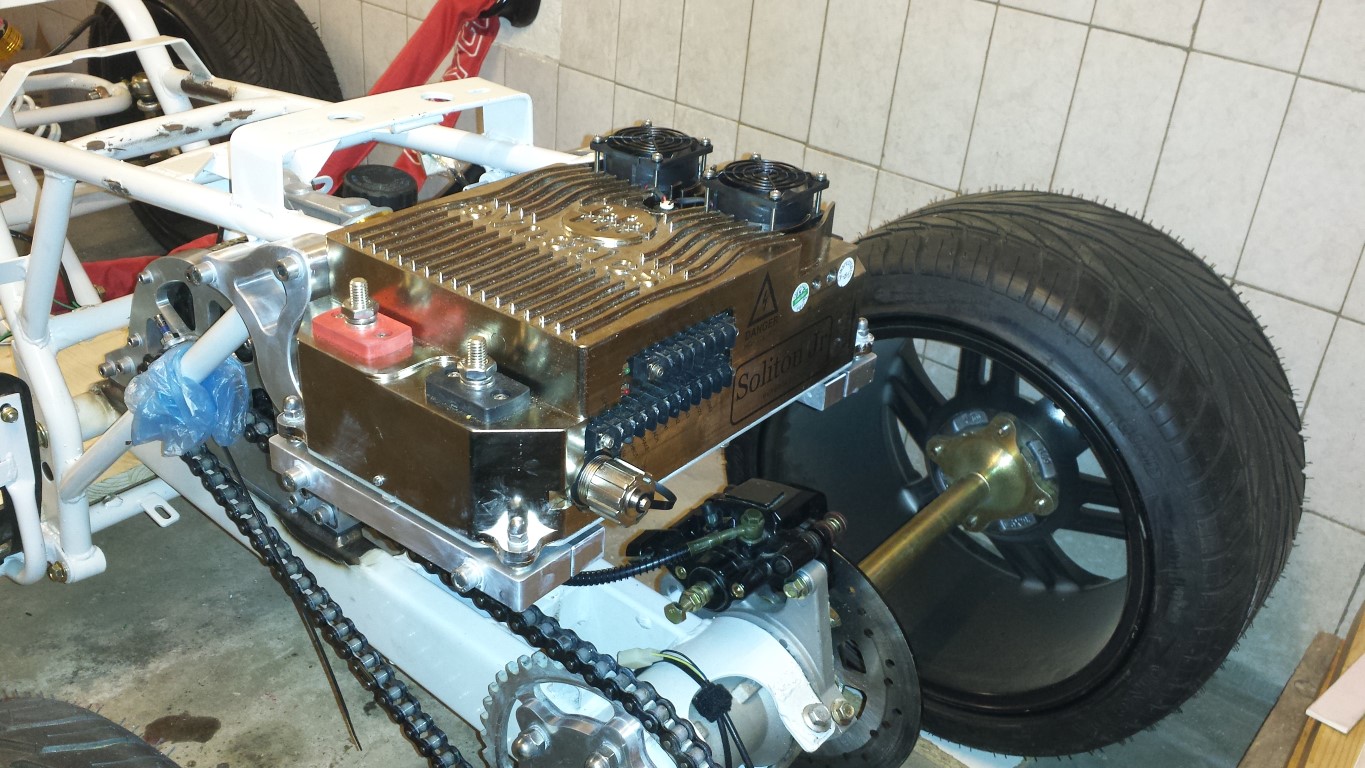
The motor back on the rear swing arm, also with the new stainless steel bolts. Looks a lot better than with the black steel bolts which were already rusting.
The inside bolts on the adaptor for the rear sprocket are also stainless steel now. Needed fine metric for this. I think there's a lot of tension on these bolts now though, don't know if this will cause any problems. Apparently they're just a tiny bit thicker than the original bolts or something. Really needed a lot of force to fasten them. Also added the last 2 cap nuts.
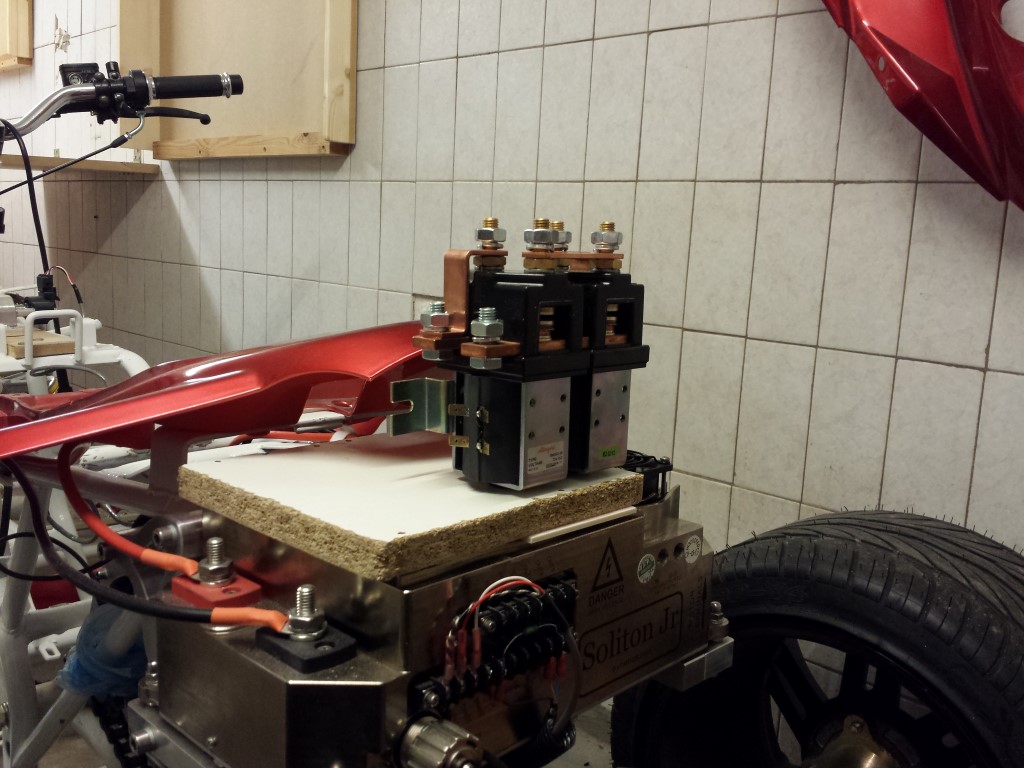
And now the mounts for the controller. I'll really keep saying this, great company who made this (Geraets Metaalbewerking). It really turned out very nicely. A lot better looking than the mounts I originally wanted. And it's definately strong enough, I think it can take at least 10x the weight of the controller.
Here you can see it fitted on the quad bike with the controller already on it.
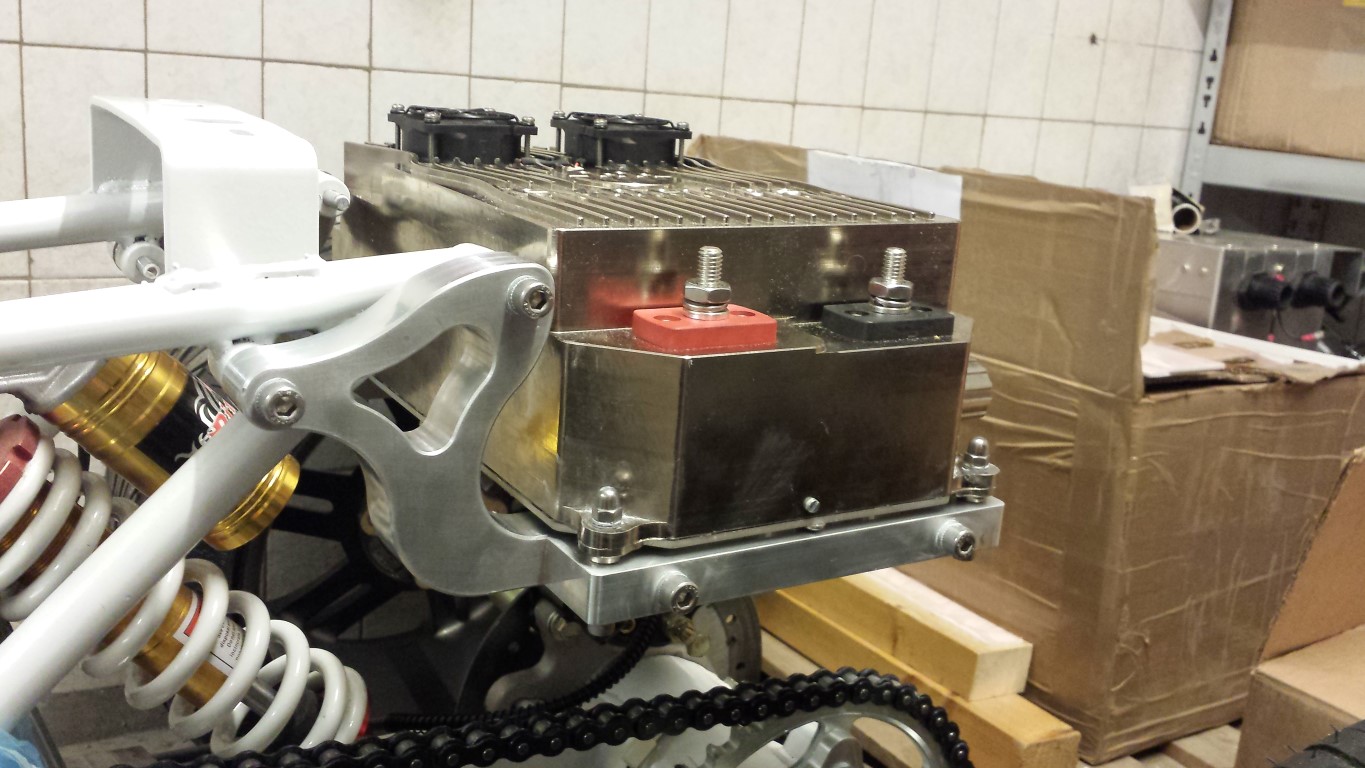
But it's all still loose, I first have to grind off a bit of the 2 front mounting points so the mounts will be sitting straight. Otherwise there will be too much tension on the mounts or the frame if I were to attach it like this. But it'll all be good, another day tomorrow. Here you can see that they're not sitting straight right now.
Here's the whole picture again. Rear end of the quad bike is pretty full now.
I also lubed the chain. And the rear swingarm's bearings didn't have much grease on them so I greased them some more. There's still something squeeking near the rear axle though when I turn the wheels, I think the bearings. But I'll be replacing them by SKF bearings anyway so I'll just leave it like this for now.
This weekend I'll definately have my first testride.